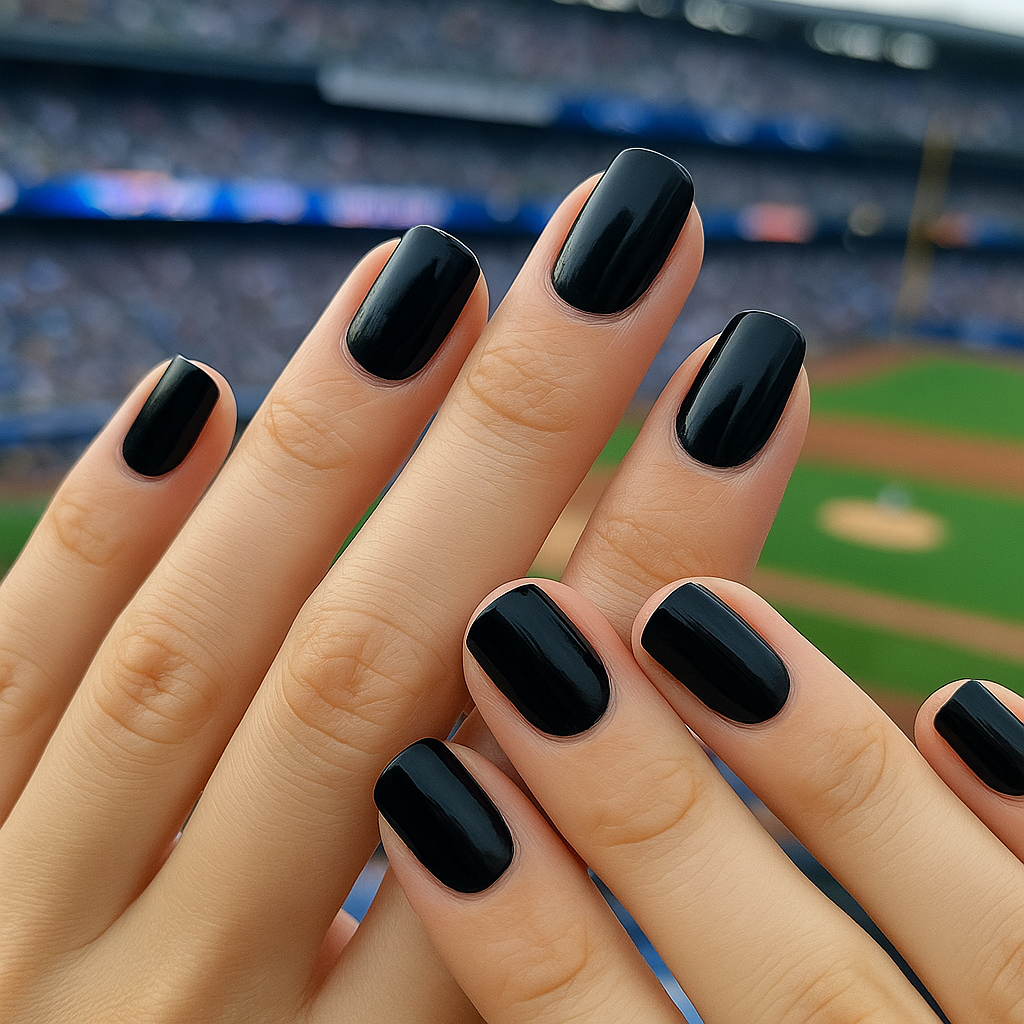
So, you want black nails but you don’t have polish? Or maybe you’re just over the mess, smell, or chemicals? Whatever your reason, you’re not alone—and the good news? There are surprisingly creative ways to get that bold black nail look without touching a single bottle of polish.
Let’s dive into the polish-free world of nail art magic!
1. Why Go Polish-Free? The Fun Behind This Trend
Imagine this: You’re getting ready for a party, you’re feeling edgy, and your outfit is screaming for those chic black nails—but oops—your polish bottle is dried out and crustier than last week’s toast. Or maybe you’re trying to avoid the strong smell of acetone because your mom’s sensitive to it. Or maybe—just maybe—you’re tired of spending $10 on something that chips in two days.
Whatever your reason, going polish-free is a total vibe—and here’s why people are loving it:
It’s creative AF. You’re not just painting nails—you’re inventing new ways to express yourself.
Allergy-safe. Some folks are sensitive to nail polish ingredients, especially formaldehyde, toluene, and other unpronounceables.
Budget-friendly. No polish? No problem. Use what you already have at home.
Eco-conscious. Fewer chemical bottles, less plastic waste—nature approves.
Plus, it’s fun! You’ll feel like a nail art MacGyver, turning everyday items into glam-worthy hacks.
2. The Sharpie Hack: Draw Your Way to Drama
Let’s start with the OG polish alternative—a black permanent marker.
What to do: Simply draw directly onto clean nails. Use the side of the marker for full coverage or the tip for cute designs like moons, stripes, or stars.
Pro tips: Wash and dry your hands first. Add a little clear lip balm or top coat (if you have it) to seal the deal and prevent smudging.
Longevity: This lasts about a day or two, perfect for events or photoshoots.
⚠️ Warning: Don’t use on broken or sensitive skin. And avoid getting marker under your nails—it’s a nightmare to remove.
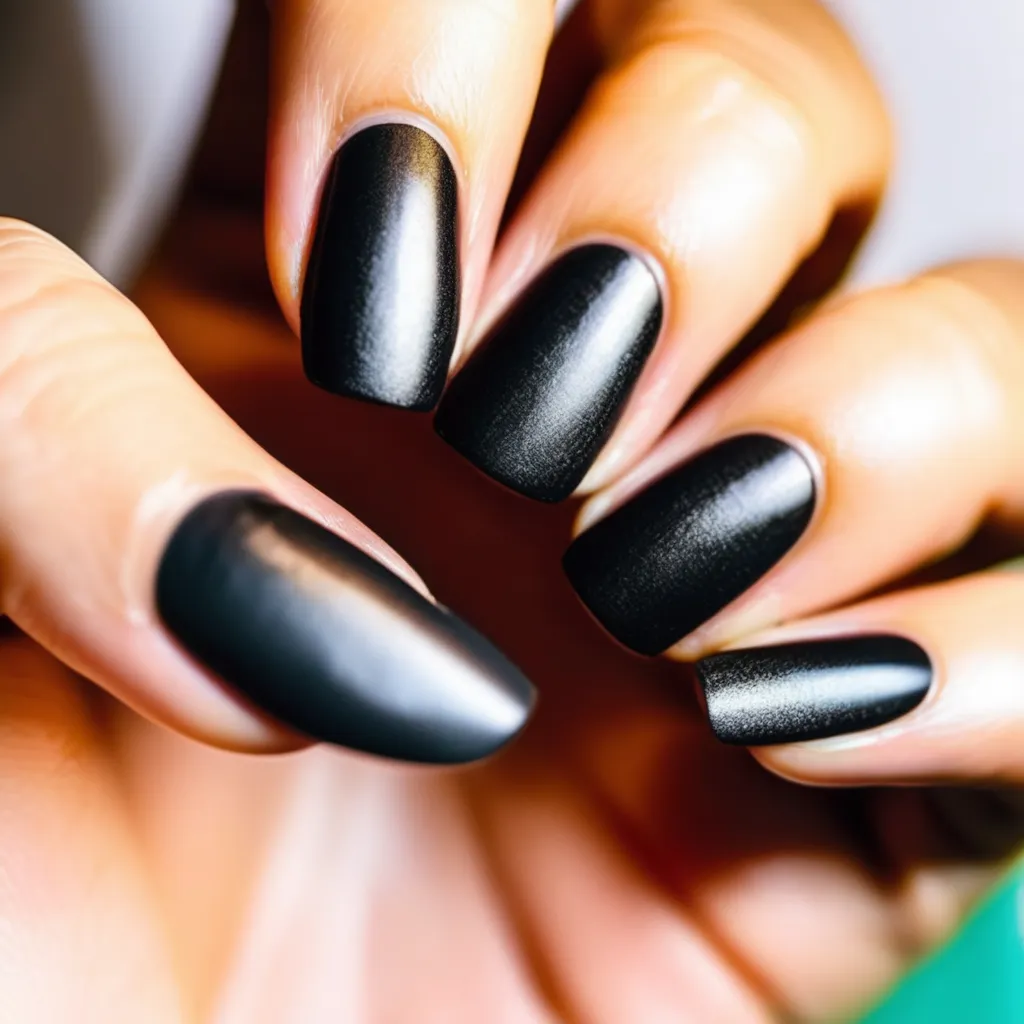
Yes, you read that right—a simple black Sharpie can actually give you the moody matte nails of your dreams. It’s fast, easy, and totally DIY-approved. Whether you’re running late for a hangout or just vibing in your room and feel like switching up your style—this hack is as instant as it gets.
⚡ Why It Works
Permanent markers like Sharpies are made to stick to smooth surfaces—so nails? Perfect canvas. The finish is matte and bold, which honestly gives off lowkey rockstar energy.
🛠️ How to Use a Black Marker for Nail Art
What You’ll Need:
A non-toxic black permanent marker (Sharpie is a fave)
Clean nails (no lotion or oil)
Optional: clear balm, gloss, or hairspray for sealing
Step-by-Step:
Clean your nails. Wipe them with a little rubbing alcohol to remove oil and dirt—this helps the marker grip better.
Color it in. Use the side of the marker to gently color each nail. One even coat is enough.
Feeling artsy? Use the tip to draw little hearts, dots, or even flames.
Let it dry for 60 seconds. It dries super quick!
Optional: Lock it in with a tiny bit of clear balm, gloss, or a spritz of hairspray.
🚫 Which Markers to Avoid
Not all markers are safe for skin contact, so here’s the deal:
❌ Avoid industrial or metallic markers—they often contain harsh solvents and can stain skin or cause irritation.
❌ Skip dry-erase or whiteboard markers—they’re designed to wipe off easily (so they won’t last) and aren’t skin-friendly.
✅ Use only non-toxic, skin-safe permanent markers. Sharpie Fine Point or similar is usually okay for short-term use.
⚠️ A Word of Caution (Especially for Teens & Kids)
We get it—this trick is super fun and feels a bit rebellious (in the best way), but it’s important to use it responsibly.
Don’t make this your everyday go-to. Overusing markers on skin can lead to dryness, irritation, or staining.
Avoid chewing or biting your nails after using marker—just in case any residue remains.
Always check the label. If it doesn’t say non-toxic, don’t use it!
This is a fun emergency fix, not a full-time nail routine.
✨ Why You’ll Love It
Matte and bold finish in under 2 minutes.
Easy to clean up with rubbing alcohol or makeup remover.
Budget-friendly—you probably already have one in your pencil case or junk drawer.
The Sharpie method is perfect when you’re in a pinch and still want to serve a look. Just be smart, stay safe, and keep those nails fabulous—even if it’s just for the weekend.
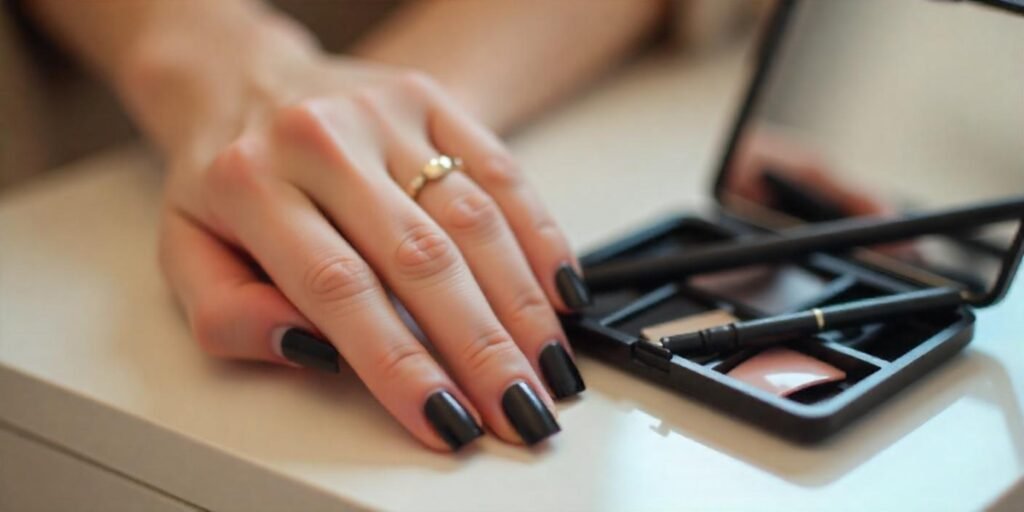
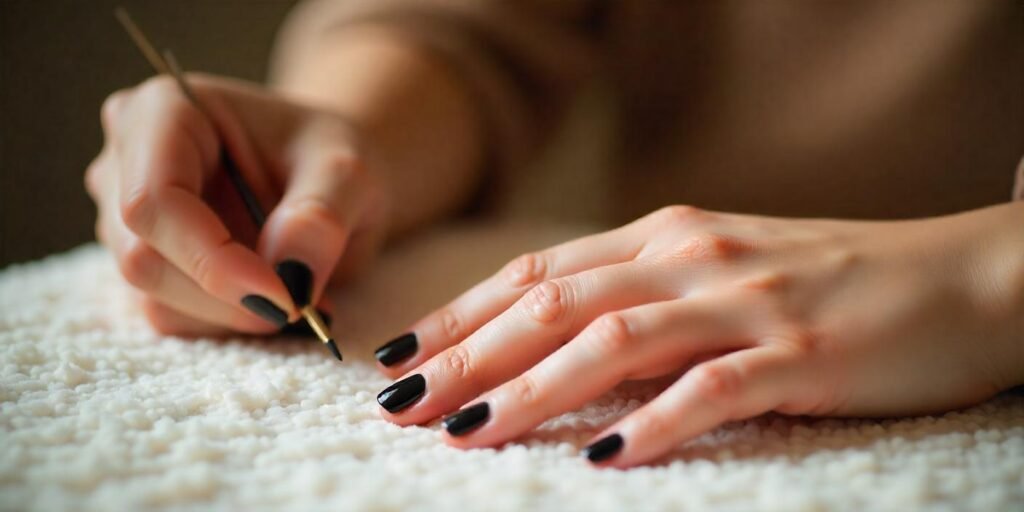
3. Black Eyeshadow + Clear Lip Balm = Instant Edgy Nails
Yup, your makeup bag just became a nail salon.
What you’ll need:
Black eyeshadow (the powder kind)
A little clear lip balm or petroleum jelly
A cotton swab or brush
Steps:
Rub a thin layer of balm on your nail.
Use a brush to press black eyeshadow onto the sticky base gently.
Blend it in until the nail is evenly covered.
Optional: Seal with a light layer of balm or clear gloss.
Result: A soft, matte-black finish that looks super cool and artsy.
💡 Pro move: Try smoky gradients by blending in some dark gray or shimmer!
Got a broken black eyeshadow sitting in the corner of your palette? Or maybe just one you never use? Give it new life—on your nails! This hack is pure DIY brilliance. By turning black eyeshadow into a soft matte paint, you can get that chic, smoky nail look that screams creativity with zero commitment.
🧪 What You’ll Need
Black matte eyeshadow (pressed or loose powder)
A drop of water, aloe gel, or even clear lip gloss
Small flat brush, paintbrush, or eyeliner brush
Cotton swab or tissue for touch-ups
🎨 Step-by-Step: Turn Eyeshadow into Nail Paint
Scrape and crush. Use the edge of a coin, spatula, or tweezers to crush a small amount of the black shadow onto a clean surface (a plate or mirror works great).
Mix your magic. Add 1–2 drops of water or aloe gel. Mix with your brush until it forms a smooth, paint-like paste.
Water = quick-dry and more matte
Aloe = smoother texture and longer wear
Paint it on. Use your brush to apply the mixture to each nail. You can go full coverage or play with gradients and smudges for that smoky glam look.
Let it dry completely. It dries fairly quickly—within 3–5 minutes.
Seal if you want. For longer wear, tap on a bit of clear gloss, balm, or a swipe of clear mascara (yes, really!).
🌌 Why You’ll Love This Look
Unique matte texture. Not as harsh as polish—gives a cool, soft-focus finish.
Perfect for artsy vibes. Great for creative nail looks like ombré, smoky tips, or gothic glam.
Easily removable. Just wash your hands or use makeup remover—no acetone needed.
Make it your own. Add glitter, layer with tape designs, or mix in shimmer shadow for something totally new.
🔥 Pro Tip:
Want to take it even further? Mix in a drop of clear nail polish or top coat with the eyeshadow instead of water to create a semi-permanent polish on the spot. It’ll last longer and still give you a totally custom look.
So next time you’re playing with your makeup, don’t forget your nails—they’re just another canvas for your creativity. Whether you’re going for moody artist, soft goth, or dreamy indie vibes, this hack lets you paint your own story.
4. The DIY Charcoal Paste Trick
Feeling bold and crafty? Mix up your own black nail “paint.”
You’ll need:
Activated charcoal (from capsules or powder)
A dab of aloe vera gel or thick lotion
How to use:
Mix into a thick, smooth paste.
Apply with a brush or Q-tip.
Let dry—it should give a dark, matte effect.
Why it’s cool: It’s all-natural and super fun to make.
Bonus: Activated charcoal is detoxifying. Who said beauty can’t be functional?
Want to keep things totally natural while still rocking that moody black nail vibe? You’re gonna love this one. This method is gentle, toxin-free, and kind of like a mini spa ritual—perfect for anyone with sensitive nails or for parents looking for a safe nail-painting option for kids.
The secret? Activated charcoal.
🧪 What You’ll Need
Activated charcoal powder (found in health stores or from charcoal capsules)
A few drops of coconut oil or aloe vera gel (for smoothness and skin love)
Optional: mica powder (for shimmer) or essential oils (for scent)
Small brush or cotton swab
🖌️ How to Make Natural Charcoal Nail Paste
Mix your base. In a small dish, combine 1 tsp of charcoal powder with 3–5 drops of coconut oil or aloe vera gel. Stir until you get a paste—not too runny, not too thick.
Apply like nail paint. Use a clean brush, cotton swab, or even your fingertip to smooth the paste over each nail. It’ll go on like a soft black cream.
Let it sit. You don’t need to dry it for long—this isn’t permanent. Let it set for 5–10 minutes before showing off your look.
Wipe away when you’re done. When you’re ready to remove it, just wash your hands with soap and warm water. Zero damage, zero chemicals.
✨ Bonus Fun: Add a Shimmer!
Mix in a pinch of mica powder (available in craft or soap-making stores) for a glowy, magical black shimmer. It turns the charcoal paste into something cosmic—perfect for festivals, parties, or just when you want your nails to match your mood.
🌱 Why This is a Win
Gentle on nails and skin—great for kids or sensitive types
No chemicals—just pure, skin-friendly ingredients
Short-term look—great for one-day style swaps
Customizable—add shimmer, scent, or even edible glitter (why not?)
👶 A Quick Note for Parents
This hack is kid-safe, but it can get a bit messy (charcoal is a fine powder, after all). So it’s perfect for a weekend project, sleepover activity, or just some creative bonding time.
Whether you’re the natural beauty lover, the holistic skincare nerd, or just in the mood for a cozy DIY experiment—this charcoal paste nail hack is equal parts earthy and edgy. It’s proof that you don’t need polish to make a statement—you just need a little imagination (and maybe some coconut oil).
5. Electrical Tape or Black Stickers = Instant Chic
Nail stickers? Try electrical tape or black washi tape!
Cut it into nail-sized shapes, stick it on clean nails, and press down firmly.
Shape with small scissors or a nail file for precision.
It gives an ultra-sleek, almost gel-like finish—without any actual painting. Plus, they peel off cleanly with no mess.
✔ Great for last-minute looks when you have literally zero supplies.
If you’ve ever dreamed of getting that sleek, glossy black nail look without the mess of polish, you’re going to love this trick. Black electrical tape or washi tape can totally transform your nails into edgy little masterpieces—fast. Think of it like creating your own DIY nail wraps at home. Zero drying time. Zero smudging. 100% cool.
✂️ What You’ll Need
Black electrical tape (for a glossy, gel-like look) or black washi tape (for a matte or patterned finish)
Small scissors or nail scissors
Nail file or buffer
Optional: tweezers for precision
🧼 Step-by-Step: Tape It Like a Pro
Prep those nails! Wash and dry your hands, and wipe each nail with a little rubbing alcohol or toner to remove oil. This helps the tape stick better.
Cut the tape to size. Lay the tape flat and trim small, rounded pieces that match the shape and width of your nails. Go slightly larger—you can file the edges down after applying.
Stick it on. Carefully place the tape onto your nail starting at the cuticle, pressing down and smoothing as you go. Use your fingers or tweezers to get a bubble-free fit.
Shape and trim. Use scissors to snip any excess, then file the tip of the nail in a downward motion to smooth the edge.
Seal it in (optional). You can dab a clear balm or top coat over the tape for extra hold and shine—but honestly, it looks amazing as-is.
🌟 Bonus Tip: Get Creative with Shapes
Don’t stop at full coverage—have fun with it!
Cut tiny stars, moons, or hearts and layer them over nude nails.
Go for geometric strips or half-moon tips for a modern look.
Use a hole puncher to make perfect mini dots or patterns.
It’s like stickers—but way cooler and 100% customizable.
🤩 Why It Rocks
No drying time. Just stick and go!
Mess-free and precise. Ideal if you’ve ever cried over a ruined manicure.
Budget-friendly. A roll of tape = dozens of nail looks.
Easily removable. Just peel it off—no acetone needed.
This hack is perfect for anyone who wants glossy black nails that look salon-fresh without lifting a brush. Whether you’re going full glam, minimalist chic, or just experimenting with shapes, black tape has your back (and your nails).
6. Old School Ink Method (for the Truly Brave)
If you’re desperate… you can dip a fine brush or Q-tip into black ink (from a pen or calligraphy pot).
It dries fast, goes on dark, and stays for a day or two.
But be careful—ink stains skin and fabrics, so only do this when you’re confident (and not wearing your favorite white shirt).
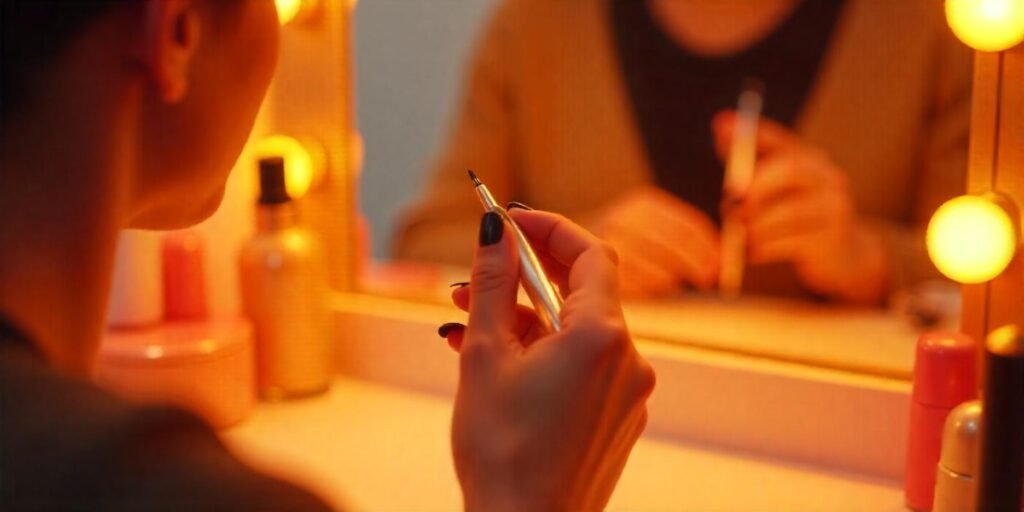
Using Eyeliner: Your Makeup Bag’s Secret Weapon 💄🖤
You know that black liquid or gel eyeliner that never lets you down on a winged liner day? Turns out—it’s also amazing for your nails. If you’re short on polish but have a trusty eyeliner pen or gel pot, you’ve got everything you need for instant black nails.
Let’s break it down.
🎯 Why Eyeliner Works for Nails
It’s already designed to stay put on oily skin—so it can handle your nails too.
It dries super fast, making it a great quick-fix before you run out the door.
It has precision—so you can go full coverage or try intricate nail art.
🪄 How to Use Eyeliner to “Paint” Your Nails
Whether you’ve got a pen, a brush-tip liquid, or a gel pot, here’s what to do:
What You’ll Need:
Black eyeliner (liquid or gel preferred)
A steady hand
Optional: clear gloss, balm, or top coat to seal it in
Step-by-Step:
Start with clean nails. Wipe them down with rubbing alcohol or a little toner to remove oil.
Apply eyeliner directly. Use smooth, even strokes to cover the nail.
If using liquid or gel, go for thin coats to avoid streaks or clumps.
If using a pen, draw in small sections to control bleeding.
Let dry for 2–3 minutes. Don’t touch anything—resist the urge!
Optional: Apply a sealer. Dab a little clear balm, clear lip gloss, or even hairspray (spray it from a distance!) to help set it longer.
🧠 Pro Tips to Make It Last Longer
Avoid water for an hour if you can—eyeliner needs time to fully “cure” on nails.
Don’t over-layer. Too many coats = cracking.
Fix smudges easily by using a damp cotton swab—eyeliner is more forgiving than polish.
Try art! Use the eyeliner to draw stripes, moons, crosses, stars, or spiderwebs—go full goth or celestial depending on your vibe.
✨ Bonus Perks
Fast drying. No waving your hands in front of a fan for 20 minutes.
Mess-free cleanup. Don’t like how it turned out? Wipe it off with makeup remover and try again.
Perfect for last-minute looks. Heading to a concert, date, or Halloween party and need something now? Eyeliner’s got your back.
Eyeliner might just become your new secret weapon for bold, black, no-polish nails. So next time you’re doing your makeup and feeling extra, don’t stop at the face—bring the drama to your fingertips too.
Make It Stay (Even Without Polish) 💅🛡️
Okay, you’ve got your nails looking fire—whether you used eyeliner, eyeshadow, tape, or charcoal paste. But now you’re probably wondering: “How do I keep this masterpiece from smudging off the second I open a bag of chips?”
Don’t worry. We’ve got a few clever tricks to help your polish-free mani stay put, without turning to harsh chemicals or actual nail polish.
🧴 DIY Sealers That Work
Here’s what you can use to lock in your look:
💨 1. Hairspray
Yes, really. A quick spritz of hairspray over your nails can help “freeze” powder-based methods like eyeshadow or charcoal paste.
Hold the can 6–8 inches away
Spray lightly and let it dry for 30 seconds
Works best for matte finishes
💧 2. Clear Lip Balm or Petroleum Jelly
Perfect for giving tape or eyeliner nails a subtle glossy shine and a protective layer.
Dab a tiny bit on with a Q-tip
Don’t overdo it or it’ll feel greasy
Bonus: It moisturizes your cuticles too!
💦 3. Makeup Setting Spray
If you have one, use it! Especially great if you used makeup-based hacks (like eyeshadow or eyeliner).
Spray lightly over your hands
Let dry before touching anything
🔁 Touch-Up Tips (Without Wrecking the Base)
DIY nails can get a little smudgy by the end of the day—but here’s how to fix it fast:
Eyeshadow smudging? Tap on a bit more powder, then reseal with hairspray.
Tape edges peeling? Use tweezers to press them back down, then smooth with balm.
Eyeliner chipping? Re-draw the patchy part, then seal again with balm or setting spray.
Keep a mini brush, cotton swab, and a dab of product in a small container for quick fixes on the go—instant nail survival kit!
🔐 Quick Tricks to Make It Last Longer
Clean nails first. Always wipe your nails with rubbing alcohol or toner before applying anything. Oil = the enemy of staying power.
Avoid hot water. It can break down balms or loosen tape—go lukewarm when washing hands.
Don’t touch your nails constantly. Yes, they’re cute. But touching = fading.
No polish? No problem. With a few smart sealers and touch-up tricks, your black DIY nails can hold up through the day—and maybe even into tomorrow’s outfit.
What to Avoid: Don’t Damage Your Nails 🚫💅
Let’s get real for a sec. As fun and fabulous as DIY nail hacks can be, not every product you find lying around the house is meant for your skin—or your nails. Just because something is black and sticky doesn’t mean it’s safe to use.
So before you go rummaging through your toolbox or art bin, here’s what to skip if you want to keep your nails strong and your skin happy.
🛑 Products to Avoid (Seriously—Just No)
❌ Permanent Markers (Like Sharpies – the industrial kind)
Sure, they give bold color. But many contain harsh solvents that can dry out your nails, stain your skin, and even cause irritation or allergic reactions.
❌ Spray Paint, Wall Paint, or Craft Paint
These aren’t made for skin contact. They can trap moisture under your nail, clog pores, and contain chemicals not tested for personal use.
❌ Super Glue or Industrial Adhesives
Tempted to make that tape really stick? Don’t. Super glue is tough on natural nails, and removing it can cause peeling or even serious damage.
❌ Ink Pens and Gel Refills
They seem safe, but many gel inks can contain dyes and chemicals that aren’t skin-safe—plus, they smear and stain everywhere.
✅ Go for Skin-Safe, Nail-Friendly Options
Here’s a quick cheat sheet of what is okay to experiment with:
Safe for Nails
Use With Caution
Avoid Completely
Eyeliner (gel/liquid/pencil)
Non-toxic washable markers
Permanent markers
Eyeshadow + water/aloe
Electrical tape (short-term use)
Craft paint/spray paint
Activated charcoal paste
Clear balm/gloss as sealers
Super glue or heavy adhesives
❤️ Your Health Comes First
It’s easy to get caught up in the excitement of experimenting, but your nails are part of your body. If something feels off—itchy, dry, burning, or just weird—wash it off immediately.
Patch test if unsure. Try a tiny dab on the back of your hand first.
Keep your nails clean and moisturized. Especially after removing any DIY look.
Take breaks. Let your nails breathe for a day or two between styles.
Bling It On: Rhinestones, Stickers & Sparkles
Why stop at black when you can add a little flair?
Okay, so your nails are blacked out and looking fierce—now it’s time to turn them into a canvas. Just because you’ve ditched the polish doesn’t mean you’re stuck with plain Jane vibes. This is where you get to sprinkle some personality on top, making those dark tips scream you. Decorating’s the fun part, and trust me, the options are endless.
Grab a nail art pen if you’ve got one—those fine tips are perfect for doodling tiny stars, moons, or even some abstract squiggles that look cooler than they sound. No pen? No stress. A toothpick dipped in whiteout (yep, the office stuff) works in a pinch for that DIY punk vibe. Want something flashier? Tiny rhinestone stickers or flat-back gems can be pressed on with a dab of clear glue—think eyelash glue or even a topcoat if you’ve got it handy. They catch the light and instantly elevate your look from “I did this in my room” to “I’m ready for the runway.”
If sparkle’s your thing, glitter gel is a game-changer. A little swipe over your black base adds dimension, like a starry night sky on your fingertips. No gel? Raid your craft stash for loose glitter and seal it with a clear gloss or even hairspray (pro tip: it’s temporary but it works). You could also layer on some metallic sharpie streaks for a futuristic edge—because who said nails can’t be art?
This is all about self-expression, so go wild. Mix and match: rhinestones on one nail, doodles on another, a glitter accent on your pinky. Maybe you’re feeling witchy with crescent moons or grunge with some faux cracks. Your nails, your rules. The best part? Since you’re not locked into polish, you’re free to experiment without the mess or commitment. So grab what’s around you, get creative, and make those black beauties a masterpiece that’s 100% yours.
Mini rhinestones – Pop them on with a dab of clear lip balm or lash glue (just a dot!).
Loose glitter or glitter gel – Dab on the tips or make a bold stripe down the middle.
💡 Pro tip: Add glitter before sealing with hairspray or balm for a longer-lasting sparkle.
Using Black Sharpie For A Quick Nail Makeover
If you’re in the mood for a quick and edgy nail makeover but don’t have any black nail polish on hand, don’t worry! You can still achieve that sleek, dark look using something you probably already have lying around: a black Sharpie. While it might sound unconventional, using a Sharpie can be a fun and easy way to get black nails in a pinch. Plus, it’s a great hack for when you’re short on time or just want to experiment without committing to a full manicure. Let’s walk through how you can do this safely and effectively.
First things first, make sure your nails are clean and dry. Any oils or dirt on your nails can make it harder for the Sharpie ink to stick, and you want the color to last as long as possible. You can quickly wash your hands with soap and water, or use a bit of rubbing alcohol on a cotton pad to wipe down your nails. This will also help the ink go on more smoothly.
Once your nails are prepped, grab your black Sharpie. It’s best to use a fine-tip or ultra-fine-tip Sharpie for more control, especially if you want to avoid getting ink all over your cuticles. Start by carefully coloring in each nail, working slowly to ensure even coverage. You might need to go over each nail a couple of times to get that deep, opaque black look. Don’t worry if the ink looks a little streaky at first; it tends to even out as it dries.
Now, here’s a little tip: if you accidentally color outside the lines and get Sharpie on your skin, don’t panic! You can easily clean it up with a cotton swab dipped in rubbing alcohol or nail polish remover. Just gently rub the area until the ink comes off. This will help keep your nails looking neat and polished, even though you’re using a marker instead of actual nail polish.
After you’ve finished coloring in all your nails, give them a few minutes to dry completely. Sharpie ink dries pretty quickly, but it’s always a good idea to wait a little longer to avoid smudging. Once the ink is dry, you can leave your nails as they are for a matte black look, or you can take it a step further by adding a clear top coat. A clear top coat will not only give your nails a glossy finish but also help seal in the Sharpie ink, making it last longer and preventing it from rubbing off too easily.
Keep in mind that while this is a fun and temporary solution, it’s not as durable as regular nail polish. The Sharpie ink may start to fade or chip after a day or two, especially if your hands are frequently in water. But the good news is that it’s super easy to touch up! Just grab your Sharpie and fill in any spots that need a little extra love.
So, the next time you’re craving black nails but don’t have any polish on hand, give this Sharpie hack a try. It’s quick, easy, and surprisingly effective for a last-minute nail makeover. Just remember to be careful with the application, and you’ll be rocking those black nails in no time!
DIY Charcoal Nail Art: A Natural Alternative
If you’re looking to rock a bold, edgy look but don’t have any black nail polish on hand, don’t worry! You can still achieve that dark, mysterious vibe with a little creativity and some natural ingredients. One of the best alternatives to traditional nail polish is using charcoal. Yes, you read that right—charcoal! It’s a natural, non-toxic option that can give your nails that deep, matte black finish without the chemicals found in regular nail polish. Plus, it’s a fun DIY project that’s surprisingly easy to pull off.
First things first, you’ll need to gather your materials. The star of the show here is activated charcoal powder, which you can find at most health food stores or online. Activated charcoal is often used in skincare and detox products, so it’s safe to use on your nails. You’ll also need a clear base coat or a natural oil like coconut or olive oil to help the charcoal stick to your nails. If you want to get fancy, you can even add a top coat for extra shine or durability, but that’s totally optional.
Once you’ve got everything ready, start by prepping your nails. Make sure they’re clean and free of any old polish or oils. You can give them a quick wash with soap and water, or use a bit of rubbing alcohol to remove any residue. If your nails are a bit uneven or rough, now’s a good time to file them down and smooth out the surface. This will help the charcoal adhere better and give you a more polished look (pun intended!).
Next, apply a thin layer of your base coat or oil to each nail. If you’re using a clear base coat, this will act as a sticky surface for the charcoal to cling to. If you’re going the natural route with oil, just make sure not to overdo it—a little goes a long way. You want your nails to be slightly tacky, not drenched.
Now comes the fun part! Dip a small brush or even a cotton swab into the activated charcoal powder and gently press it onto your nails. You can build up the color by adding more layers until you reach your desired level of blackness. The charcoal will give your nails a matte, textured finish, which is perfect if you’re going for that grunge or goth aesthetic. If you prefer a smoother look, you can lightly buff the surface with a soft cloth or your fingers.
Once you’re happy with the coverage, let your nails sit for a few minutes to allow the charcoal to set. If you want to seal the deal, you can apply a clear top coat to lock in the color and add some shine. However, if you’re loving the matte look, feel free to skip this step.
And there you have it—DIY charcoal nail art that’s both natural and stylish! Not only is this method a great alternative to traditional nail polish, but it’s also a fun way to experiment with different textures and finishes. Plus, you can feel good knowing that you’re using a non-toxic, eco-friendly option. So go ahead, give it a try, and let your nails make a statement!
How To Use Black Acrylic Paint For Nail Designs
If you’re looking to rock a bold, edgy look but don’t have any black nail polish on hand, don’t worry! You can still achieve that sleek, dark manicure using black acrylic paint. While acrylic paint isn’t specifically designed for nails, it can be a great alternative in a pinch. Plus, it opens up a world of creative possibilities for nail designs. Just follow a few simple steps, and you’ll be flaunting your black nails in no time.
First things first, make sure your nails are clean and prepped. Just like with regular nail polish, you want to start with a smooth surface. Wash your hands thoroughly and remove any old polish or oils from your nails. You can use a nail buffer to gently smooth out the surface of your nails, which will help the acrylic paint adhere better. Once your nails are prepped, it’s time to gather your materials.
You’ll need black acrylic paint, a small paintbrush, and a clear top coat. Acrylic paint is water-based, so it’s easy to work with and dries quickly. However, it’s important to note that acrylic paint can be a bit thicker than nail polish, so you’ll want to use a fine brush to apply it. If you don’t have a nail art brush, a small, clean paintbrush will do the trick. You can even use a toothpick for more detailed designs if you’re feeling creative.
Now, let’s get to painting! Start by dipping your brush into the black acrylic paint and applying a thin layer to your nails. It’s better to start with a light coat and build up the color gradually. If you apply too much paint at once, it can become clumpy or uneven. Don’t worry if the first coat looks a little streaky – you can always add a second coat once it dries. The key is to be patient and let each layer dry completely before adding more paint.
Once you’ve achieved the desired opacity, you can get creative with your design. Acrylic paint is perfect for nail art because it’s easy to manipulate and dries quickly. You can add dots, stripes, or even intricate patterns using different brushes or tools. If you make a mistake, don’t panic! Since acrylic paint is water-based, you can easily wipe away any errors with a damp cotton swab before it dries.
After you’ve finished painting your nails, it’s crucial to seal the design with a clear top coat. Acrylic paint can be prone to chipping, so a top coat will help protect your hard work and give your nails a glossy finish. Apply one or two layers of top coat, making sure to cover the entire nail and the edges to prevent any peeling. Let your nails dry completely, and voilà – you’ve got a stunning black manicure without using traditional nail polish!
One thing to keep in mind is that acrylic paint isn’t formulated for long-term wear on nails, so your manicure might not last as long as it would with regular nail polish. However, it’s a fun and easy way to experiment with different designs and colors, especially if you’re in a pinch. Plus, when you’re ready to remove the paint, it’s as simple as soaking your nails in warm, soapy water and gently wiping it away.
So, the next time you’re craving a black manicure but don’t have nail polish on hand, grab some black acrylic paint and let your creativity flow!
Creating A Matte Black Look With Eye Shadow
If you’re in the mood for a chic, matte black nail look but don’t have any black nail polish on hand, don’t worry! You can still achieve that edgy vibe using something you probably already have in your makeup bag—black eye shadow. Yes, you read that right! Eye shadow can be a surprisingly effective substitute for nail polish, and the best part is, it’s super easy to do. Let me walk you through the steps to create a matte black look for your nails using eye shadow.
First things first, you’ll need to gather a few supplies. Aside from black eye shadow, you’ll also need a clear base coat or top coat, a small brush (like an old makeup brush or even a cotton swab), and a little bit of patience. If you want to make the look last longer, having a clear top coat is essential, but we’ll get to that in a bit.
Start by prepping your nails. Just like with regular nail polish, you want to make sure your nails are clean and free of any oils or old polish. Wash your hands thoroughly and, if needed, use a nail file to shape your nails to your liking. Once your nails are prepped, apply a thin layer of clear base coat. This will help the eye shadow stick better and give your nails a smoother finish. Let the base coat dry completely before moving on to the next step.
Now comes the fun part—applying the eye shadow. Take your black eye shadow and, using your small brush or cotton swab, gently tap the powder onto your nails. You don’t need to be super precise here, but try to cover the entire nail evenly. If you want a more intense black, you can layer the eye shadow until you reach your desired shade. The great thing about using eye shadow is that it gives you a soft, matte finish right off the bat, which is perfect if you’re going for that trendy, understated look.
Once you’ve applied the eye shadow to all your nails, it’s time to seal the deal. This is where your clear top coat comes in. Carefully apply a layer of clear top coat over the eye shadow to lock it in place. Be gentle with your brush strokes, as you don’t want to smudge the eye shadow underneath. The top coat will not only help the color last longer but also give your nails a bit of shine. If you prefer to keep the matte look, you can opt for a matte top coat instead. Either way, the top coat is crucial for making sure your DIY nail color stays put.
And there you have it! A matte black nail look without a single drop of nail polish. It’s a quick and easy hack that’s perfect for when you’re in a pinch or just want to try something different. Plus, it’s a great way to make use of makeup products you already own. So next time you’re craving that bold black nail look but don’t have any polish on hand, just reach for your eye shadow and get creative!