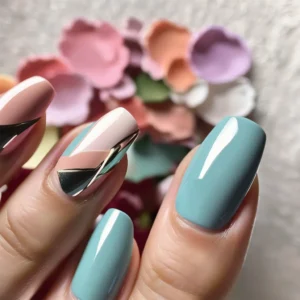
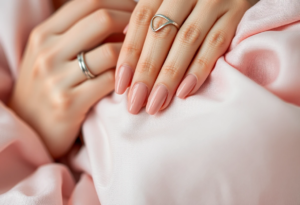
Acrylic Nail Tips: Maintaining Healthy Nails and Preventing Infections
Acrylic nail tips have become a popular choice for those looking to add a touch of glamour and style to their hands. However, maintaining healthy nails and preventing infections is crucial when using these artificial enhancements. In this article, we’ll share some essential acrylic nail tips to help you keep your nails looking fabulous while ensuring their health and well-being.
First and foremost, it’s essential to choose a reputable salon that follows proper hygiene practices. A clean and well-maintained salon is less likely to expose you to infections or other nail-related issues. Always ask about the sterilization process for tools and equipment, and don’t hesitate to walk away if you’re not satisfied with their answers.
Before getting acrylic nails, make sure your natural nails are in good condition. Trim and file them to remove any rough edges or uneven surfaces. This will help the acrylic adhere better and reduce the risk of lifting or peeling. Additionally, avoid using harsh chemicals or acetone-based nail polish removers on your natural nails, as these can weaken them and make them more susceptible to damage.
When it comes to the application of acrylic nails, it’s crucial to find a skilled technician who knows what they’re doing. A poorly applied acrylic can lead to lifting, cracking, or even infections. Ask for recommendations from friends or family, or read online reviews to find a technician with a good track record.
During the application process, your technician should use a primer on your natural nails to help the acrylic adhere better. They should also use a bonding agent to ensure a strong bond between your natural nail and the acrylic. Be sure to communicate any allergies or sensitivities you may have to certain products, as some individuals may be allergic to certain ingredient.
Read Also: How to paint your nails black
The Ultimate Guide to Acrylic Nail Tips: Techniques, Trends, and Tips for Perfect Application
Acrylic nail tips have become a staple in the beauty world, offering a quick and easy way to achieve long, glamorous nails. Whether you’re a seasoned pro or a newbie to the world of acrylics, this ultimate guide will walk you through the techniques, trends, and tips for perfect application. So, grab your tools and let’s dive in!
First things first, let’s talk about the basics. Acrylic nail tips are made from a mixture of liquid monomer and powder polymer, which creates a hard, durable nail extension. These tips come in various sizes and shapes, allowing you to customize your nails to perfection. To apply acrylic nail tips, you’ll need a few essential tools: acrylic nail tips, nail glue, a nail file, and a buffer.
Now that you have your tools, it’s time to get started. Begin by preparing your natural nails. This involves gently pushing back your cuticles, removing any old nail polish, and filing your nails to the desired shape. Remember, a well-prepared nail bed is crucial for a flawless application.
Next, select the appropriate acrylic nail tip for each finger. It’s essential to choose a tip that matches the natural nail’s shape and size. Once you’ve found the perfect fit, apply a thin layer of nail glue to the tip and press it firmly onto your natural nail. Hold it in place for a few seconds to ensure a strong bond.
Now, it’s time to blend the acrylic tip with your natural nail. Using a nail file, gently shape the tip to match the natural nail’s contour. Be careful not to file too aggressively, as this can weaken the acrylic. Aim for a seamless transition between your natural nail and the acrylic tip.
Once you’ve achieved the desired shape, it’s time to buff the surface. This step is crucial for creating a smooth, even base for your nail polish. Use a buffer to gently smooth out any rough edges or bumps.
Now that your acrylic nail tips are perfectly shaped and buffed, it’s time to add some color! Choose your favorite nail polish and apply it to your nails, starting from the base and working your way up to the tip. Be sure to apply thin, even coats for a professional finish.
As you can see, applying acrylic nail tips is a straightforward process that can be mastered with a little practice. But, like any skill, there are always new techniques and trends to explore.
One popular trend in the world of acrylic nails is the use of gel polish. Gel polish offers a long-lasting, chip-resistant finish that’s perfect for those who want to maintain their acrylic nails for an extended period. To apply gel polish, simply follow the same steps as with regular nail polish, but remember to cure your nails under a UV or LED lamp for the best results.
Another exciting trend is the use of 3D nail art. With acrylic nail tips, you can create intricate designs and patterns that are sure to turn heads. From geometric shapes to floral designs, the possibilities are endless. To achieve this look, use a nail art brush and acrylic paint to add your desired design to the tips.
Finally, let’s talk about some essential tips for maintaining your acrylic nails. First, avoid using your nails as tools, as this can cause them to weaken and break. Second, keep your nails hydrated by applying cuticle oil regularly. This will help prevent dryness and cracking. Lastly, visit your nail technician every two to three weeks for a fill-in or maintenance appointment. This will ensure your acrylic nails stay looking their best.
In conclusion, acrylic nail tips are a fantastic way to achieve long, glamorous nails in no time. With the right tools, techniques, and trends, you can create a stunning manicure that will last for weeks. So, whether you’re a seasoned pro or a newbie to the world of acrylics, this ultimate guide will help you achieve the perfect application. Happy nail-painting!
Read Also: 10 stunning color french tip nail designs

how long do acrylic nail tips last
Acrylic nail tips have become a go-to choice for many people looking to add a touch of glamour and sophistication to their hands. These artificial nails are a fantastic way to achieve that salon-quality look without the hefty price tag. But one question that often pops up is, “How long do acrylic nail tips last?” Well, let’s dive into the world of acrylic nails and uncover the secrets to their longevity.
Acrylic nail tips are a popular choice for those who want to enhance their natural nails with a little extra flair. They’re durable, versatile, and can be customized to suit any style or occasion. But how long can you expect these beauties to last? Let’s explore the lifespan of acrylic nail tips and what factors can influence their longevity.
First off, it’s essential to understand that the lifespan of acrylic nail tips can vary depending on several factors. Generally, acrylic nails can last anywhere from two to three weeks, but with proper care, they can even stretch up to a month. However, this is just a rough estimate, and the actual duration can be influenced by your lifestyle, the quality of the application, and how well you maintain them.
One of the most crucial factors that determine the lifespan of your acrylic nails is how well they’re applied. A skilled nail technician will ensure that the acrylic is applied correctly, which can significantly extend the life of your nails. A well-done application will have a strong bond between your natural nail and the acrylic, reducing the chances of lifting or breaking. So, if you’re considering getting acrylic nails, make sure to choose a reputable salon with experienced technicians.
Another factor that can affect the longevity of your acrylic nails is your daily routine. If you’re someone who loves to engage in activities that put your nails at risk, such as typing, gardening, or cooking, you might find that your nails don’t last as long. On the other hand, if you’re more of a relaxed type, your acrylic nails might last longer. It’s all about finding a balance between enjoying your daily activities and taking care of your nails.
Proper maintenance is key to extending the life of your acrylic nails. Regularly moisturizing your cuticles and hands can help prevent dryness and cracking, which can lead to lifting and breakage. Additionally, avoiding harsh chemicals and wearing gloves when doing household chores can help protect your nails. Remember, your nails are delicate, so treat them with care!
Another aspect to consider is the quality of the acrylic itself. High-quality acrylics tend to last longer than their cheaper counterparts. Investing in a good quality product can make a significant difference in how long your nails will last. So, don’t be afraid to spend a little extra for a longer-lasting, more durable set of nails.
Now, let’s talk about the dreaded lifting. Lifting occurs when the acrylic starts to separate from your natural nail, which can lead to breakage and a shorter lifespan. To prevent this, avoid exposing your nails to excessive moisture, such as soaking them in water for extended periods. Also, be gentle when removing any nail polish or adhesive, as harsh removal methods can weaken the bond between your natural nail and the acrylic.
It’s also essential to keep your nails clean and dry. Moisture can weaken the bond between your natural nail and the acrylic, leading to lifting and potential breakage. Regularly cleaning under your nails and keeping them dry can help prevent this issue.
Lastly, regular maintenance is crucial. Visiting your nail technician for fill-ins every two weeks can help maintain the integrity of your acrylic nails. This will ensure that any lifting or damage is addressed promptly, preventing further issues and extending the life of your nails.
In conclusion, acrylic nail tips can last anywhere from two to three weeks, but with proper care and maintenance, they can last up to a month. Remember, the key to long-lasting acrylic nails is a combination of a skilled application, a gentle daily routine, and regular maintenance. So, if you’re considering acrylic nails, don’t be discouraged by their lifespan. With the right care, you can enjoy that salon-quality look for weeks on end.
In summary, acrylic nail tips are a fantastic way to enhance your natural nails and add a touch of glamour to your hands. While their lifespan can vary, proper care and maintenance can help extend their longevity. So, go ahead and indulge in that salon-quality look without the hefty price tag. With the right care, you can enjoy beautiful, long-lasting acrylic nails that will make you feel like a million bucks.
how much are french tip acrylic nails
Acrylic nail tips have become a staple in the world of nail art, offering a glamorous and long-lasting solution for those who want to add a touch of elegance to their hands. But have you ever wondered how much it costs to get French tip acrylic nails? Well, you’re in luck because we’re about to dive into the nitty-gritty of pricing and what factors can influence the cost of this popular nail trend.
When it comes to French tip acrylic nails, the price can vary depending on several factors, including the salon you choose, the quality of the materials used, and the expertise of the nail technician. So, let’s break it down and explore the different aspects that can affect the cost of this chic nail style.
First things first, the salon you visit plays a significant role in determining the price. High-end salons with a reputation for luxury services may charge more for their French tip acrylic nails compared to a local nail shop. The cost can range anywhere from $20 to $50 per hand, depending on the location and the salon’s prestige. On the other hand, a more budget-friendly salon might offer this service for as low as $10 to $20 per hand. It’s essential to remember that you often get what you pay for, so it’s crucial to consider the quality of the materials and the skill of the technician when choosing where to get your nails done.
Speaking of materials, the quality of the acrylic powder and liquid used can also impact the price. High-quality products tend to be more expensive, but they can provide a more natural and long-lasting finish. Cheaper materials may save you money upfront, but they might not last as long or look as good. So, it’s a balancing act between cost and quality.
Another factor to consider is the expertise of the nail technician. A highly skilled technician who has mastered the art of creating the perfect French tip can charge more for their services. Their experience and precision can make a significant difference in the final result, so it’s worth considering the cost of their expertise. A less experienced technician may charge less, but the outcome might not be as flawless.
Now, let’s talk about the actual process of getting French tip acrylic nails. The process involves applying a layer of acrylic to the natural nail, shaping it, and then painting the tips with a white polish to create the iconic French tip look. This process can take anywhere from 30 minutes to an hour, depending on the salon and the technician’s speed. Some salons may offer additional services, such as nail shaping, cuticle care, and a top coat, which can add to the overall cost.
But wait, there’s more! If you’re looking for a more personalized experience, you might opt for a custom French tip design. This can include intricate patterns, glitter, or even tiny rhinestones. Custom designs can increase the price, as they require more time and skill to create. So, if you’re looking for something unique, be prepared to pay a little extra.
Now, let’s talk about maintenance. French tip acrylic nails typically last for about two to three weeks, depending on your lifestyle and how well you take care of them. To extend their lifespan, it’s essential to avoid harsh chemicals and activities that can damage the acrylic. Regular touch-ups can also help keep them looking fresh. The cost of these touch-ups can vary, but they usually range from $10 to $20 per hand.
In conclusion, the cost of French tip acrylic nails can vary depending on several factors, including the salon, materials, and technician’s expertise. While the price may seem steep, the result is a beautiful, long-lasting nail style that can elevate your look. So, if you’re considering this trendy nail style, it’s essential to weigh the cost against the benefits and decide what works best for you.
Remember, investing in your appearance can boost your confidence and make you feel fabulous. So, whether you’re a first-timer or a seasoned acrylic nail enthusiast, French tip acrylic nails are a stylish option worth considering. Just be sure to do your research and choose a salon that offers quality materials and skilled technicians to ensure you get the best results. Happy nail-painting!

how to do acrylic nails without tips
Acrylic nails have become a go-to choice for many people looking to add a touch of glamour and durability to their manicure routine. But what if you’re in a pinch and don’t have acrylic nail tips on hand? Fear not, because today, we’re going to explore the world of acrylic nails without tips. Yes, you heard that right! You can achieve that stunning, long-lasting look without the need for those pesky tips. So, let’s dive into the world of acrylic nails without tips and discover how you can rock this trendy style with ease.
Acrylic nails are a fantastic way to add length and strength to your natural nails, but sometimes, we find ourselves without the necessary tools or time to prep with tips. Whether you’re a DIY enthusiast or a busy bee, there’s a way to achieve that glamorous look without them. So, let’s get started on this journey of creating beautiful acrylic nails without tips.
First things first, let’s talk about the basics. Acrylic nails are made from a mixture of liquid monomer and powder polymer, which, when combined, create a hard, durable nail enhancement. Typically, tips are used to extend the nail bed, but we’re going to bypass that step and work directly with your natural nails. The key to success here is to ensure your nails are in good shape and healthy. Trim and file your nails to your desired length, and gently buff the surface to create a rough texture. This helps the acrylic adhere better.
Now, let’s talk about the application process. Begin by applying a thin layer of primer to your natural nails. This will help the acrylic adhere to your nails. Once the primer is dry, it’s time to mix the monomer and polymer. Remember, the consistency should be like thick white glue. Dip your brush into the mixture, wipe off the excess, and apply it to your nails, starting from the cuticle and working towards the tip. Be sure to cover the entire nail, including the sides.
As you apply the acrylic, keep the brush moving to avoid creating bubbles. It’s essential to work quickly, as the mixture begins to harden. If you’re new to this, practice on a spare nail or a piece of paper to get the hang of it. Once you’ve covered your nails, let them dry for a few minutes. You’ll notice the acrylic hardening and taking shape.
After the initial layer, you might notice some ridges or unevenness. Don’t worry; this is normal. Use a nail file to smooth out any imperfections. Once you’re satisfied with the shape, apply a second layer of acrylic, following the same steps as before. This layer will help fill in any gaps and create a smooth, even surface.
Now, let’s talk about shaping and finishing. Once the acrylic is completely dry, it’s time to shape your nails. Use a nail file to create your desired shape, whether it’s square, rounded, or almond. Be gentle, as acrylic nails are more prone to breakage than natural nails. After shaping, you can buff the surface to a smooth finish.
Now, let’s talk about maintenance. Acrylic nails without tips require a bit more care than traditional acrylics. Keep your nails hydrated by applying cuticle oil regularly. Avoid using your nails as tools, as this can cause breakage. And, of course, visit your nail technician for regular fills are essential to keep your acrylics looking fresh. Every two to three weeks, visit your nail technician for a fill to maintain the length and shape.
One of the best things about acrylic nails without tips is that they’re less likely to lift or break compared to traditional acrylics with tips. However, it’s crucial to avoid harsh chemicals and activities that could damage your nails. And remember, always wear gloves when doing household chores or using cleaning products.
In conclusion, acrylic nails without tips are a fantastic alternative for those times when you’re short on time or tools. With a little practice, you can achieve that stunning, long-lasting look without the need for tips. Just remember to keep your nails healthy and well-m, and you’re good to go.
In conclusion, acrylic nails without tips are a fantastic alternative for those times when you’re short on time or tools. With a little practice, you can achieve that stunning, long-lasting look without them. So, go ahead and give it a try – your nails will thank you!
how to remove acrylic nail tips at home
Hey there, fellow nail enthusiasts! We all love the glamorous look that acrylic nail tips give us, but there comes a time when we need to bid them farewell. Whether you’re switching up your style or simply need to remove them for a fresh start, removing acrylic nail tips at home can be a breeze. In this article, we’ll walk you through the process step-by-step, so you can say goodbye to your acrylics without any hassle.
First things first, let’s talk about the tools you’ll need. Gather a nail file, acetone, cotton balls, aluminum foil, and a cuticle pusher. These items will help you remove your acrylic nail tips safely and effectively.
Now, let’s dive into the process. Before you begin, it’s essential to prepare your nails. Start by filing down the top layer of your acrylic nails. This step is crucial because it helps the acetone penetrate the acrylic more efficiently. Be gentle while filing, as you don’t want to damage your natural nails.
Once you’ve filed down the acrylics, it’s time to soak your nails in acetone. Acetone is a powerful solvent that breaks down the acrylic, making it easier to remove. Pour some acetone into a small bowl and dip a cotton ball into it. Make sure the cotton ball is saturated but not dripping.
Next, place the soaked cotton ball on top of your acrylic nail and secure it with a small piece of aluminum foil. Repeat this process for each nail. The aluminum foil helps to hold the cotton ball in place and creates a mini-spa experience for your nails. Let your nails soak for about 15-20 minutes. This waiting period allows the acetone to work its magic and soften the acrylic.
After the soaking time is up, it’s time to remove the acrylic nail tips. Gently push the cotton ball and foil off your nail, and you should notice that the acrylic has become soft and pliable. Use a cuticle pusher or an orange stick to gently scrape off the softened acrylic. Be careful not to apply too much pressure, as you don’t want to damage your natural nails.
If there are any stubborn bits of acrylic left, don’t worry! Simply reapply the cotton ball soaked in acetone and foil, and let it sit for a few more minutes. This extra soaking time should help loosen any remaining acrylic.
Once you’ve removed all the acrylic, it’s time to give your nails some TLC. Wash your hands thoroughly to remove any residual acetone, and then apply a nourishing cuticle oil to hydrate your nails and cuticles. Your nails might feel a bit sensitive after the removal process, so it’s essential to keep them moisturized.
Congratulations! You’ve successfully removed your acrylic nail tips at home. Remember, patience is key when removing acrylics, so don’t rush the process. With the right tools and a little bit of time, you can achieve salon-quality results right in the comfort of your own home.
In conclusion, removing acrylic nail tips at home is a simple and cost-effective way to switch up your nail game. By following these easy steps, you can safely and effectively remove your acrylics without any hassle. So go ahead, give your nails a fresh start, and enjoy the freedom of bare nails or try out a new nail design. Happy nailing!
can you put acrylic on natural nails without tips
Acrylic nail tips have become a go-to solution for those looking to achieve that perfect, long-lasting manicure. But have you ever wondered if you can apply acrylic directly onto your natural nails without using tips? Well, you’re in luck because today, we’re diving into the world of acrylic nails and exploring this very question.
First things first, let’s talk about what acrylic nails are. Acrylic nails are a type of artificial nail enhancement that is made from a mixture of a liquid monomer and a powder polymer. When these two components are combined, they create a hard, durable substance that can be shaped and molded onto your natural nails. Acrylic nails are known for their strength, durability, and ability to hold intricate nail art designs.
Now, let’s get to the heart of the matter: can you apply acrylic directly onto your natural nails without using tips? The answer is yes, you can! However, there are a few things you need to keep in mind before you dive into this process.
Firstly, it’s essential to ensure that your natural nails are in good condition before applying acrylic. This means that your nails should be clean, dry, and free from any polish or oils. If your nails are damaged or weak, it’s best to let them heal before attempting to apply acrylic.
Next, you’ll need to prepare your nails by buffing the surface to create a rough texture. This will help the acrylic adhere better to your natural nails. Once your nails are prepped, you can begin applying the acrylic mixture.
To apply acrylic directly onto your natural nails, you’ll need to use a brush to carefully apply the mixture onto the nail bed. Start at the cuticle and work your way towards the tip of the nail, making sure to cover the entire surface. Be careful not to apply too much pressure, as this can cause the acrylic to lift or become uneven.
Once you’ve applied the acrylic, you’ll need to shape and file your nails to your desired length and shape. It’s essential to be gentle during this process, as acrylic nails are more prone to breaking than natural nails.
Now, you might be wondering why some people choose to use acrylic tips instead of applying acrylic directly onto their natural nails. Well, there are a few reasons for this. Firstly, using tips can help to create a more even and consistent nail shape, especially if you’re not confident in your ability to shape your nails. Additionally, tips can help to protect your natural nails from damage, as they provide a barrier between your nails and the acrylic.
However, applying acrylic directly onto your natural nails can be a great option if you’re looking for a more natural-looking manicure. By applying acrylic directly onto your nails, you can achieve a seamless blend between your natural nails and the acrylic, creating a more natural and polished look.
In conclusion, yes, you can apply acrylic directly onto your natural nails without using tips. However, it’s essential to ensure that your nails are in good condition before attempting to apply acrylic, and to be gentle during the application and shaping process. Whether you choose to use tips or apply acrylic directly onto your natural nails, the most important thing is to find a method that works best for you and your nails. So go ahead and experiment with different techniques until you find the perfect manicure for you!
Q&A
1. What are acrylic nail tips?
Acrylic nail tips are artificial nail extensions made from a mixture of liquid monomer and powder polymer that hardens when exposed to air.
2. How are acrylic nail tips applied?
Acrylic nail tips are applied by first trimming and shaping the natural nails, then selecting the appropriate size of acrylic nail tip. The tip is glued to the natural nail using a special adhesive, and then the acrylic mixture is applied to the nail bed and shaped.
3. What are the benefits of using acrylic nail tips?
Acrylic nail tips provide a durable and long-lasting nail extension, can be shaped and customized to fit individual preferences, and can help to cover up damaged or weak natural nails.
4. How long do acrylic nail tips typically last?
Acrylic nail tips can last anywhere from 2 to 4 weeks, depending on the wearer’s daily activities and how well they are maintained.
5. Are there any risks associated with using acrylic nail tips?
Yes, there are some risks associated with using acrylic nail tips, including potential damage to the natural nail, allergic reactions to the chemicals used in the acrylic mixture, and the risk of infection if proper hygiene and maintenance practices are not followed.
6. How should acrylic nail tips be maintained?
Acrylic nail tips should be kept clean and dry, and regular maintenance appointments should be scheduled to fill in any gaps or repair any damage. It is also important to avoid exposing the nails to harsh chemicals or excessive moisture.
7. Can acrylic nail tips be removed at home?
While it is possible to remove acrylic nail tips at home, it is recommended to have them professionally removed to avoid damaging the natural nail. If attempting to remove them at home, it is important to follow proper removal techniques and use appropriate products to avoid causing harm to the nail.

