


Delicate Floral Line Art
Nail Tutorial
Create a stunning, minimalist manicure that celebrates the beauty of motherhood

There’s something truly special about celebrating Mother’s Day with a thoughtfully crafted manicure that speaks to the elegance and beauty of motherhood. This delicate floral line art design combines simplicity with sophistication, creating a look that’s both on-trend and timeless – just like mom.
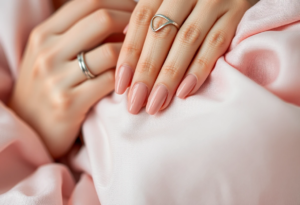
The soft pink base represents the gentle nurturing nature of motherhood, while the intricate black line art flowers symbolize growth, beauty, and the delicate care mothers provide. Whether you’re creating this look for yourself, your mother, or as a bonding activity together, this tutorial will guide you through each step to achieve a professional-looking manicure that feels like a visit to the salon.
The best part? This stunning design requires minimal tools and is surprisingly simple to create, even for nail art beginners. Let’s get started!
Materials You’ll Need
- Base coat – Protects your natural nails and helps the polish adhere better
- Pale pink nail polish – A soft, milky pink creates the perfect canvas
- Black nail art pen or thin brush – For creating the delicate line art details
- Top coat – Seals your design and adds a professional shine
- Nail file and buffer – For smooth, even nail beds
- Cuticle oil – For those finishing touches that make all the difference
- Cotton swabs and nail polish remover – For any clean-up needed

Preparation Is Key
Before diving into the artistic part, proper nail preparation will ensure your Mother’s Day manicure lasts longer and looks more professional:
-
1
Shape & File
Start with clean, dry nails and gently file them into your preferred shape. For this delicate design, slightly rounded or squoval (square with rounded edges) shapes work beautifully.
-
2
Buff the Surface
Lightly buff the surface of your nails to create a smooth canvas. This helps the polish adhere better and prevents air bubbles.
-
3
Push Back Cuticles
Gently push back your cuticles using a wooden stick or a rubber cuticle pusher. This creates a clean edge for your polish and makes your nails appear longer.
-
4
Cleanse
Wipe your nails with nail polish remover to eliminate any oils or residue that might prevent your polish from adhering properly.
The Floral Line Art Tutorial
Apply the Base Coat
Begin with a thin layer of base coat to protect your natural nails and create a smooth foundation. Allow it to dry completely before moving to the next step.
Pro Tip: Keep your base coat thin – thick layers take longer to dry and are more prone to bubbling.
Create Your Pink Canvas
Apply two thin coats of your pale pink polish, allowing each layer to dry completely. This soft color creates the perfect backdrop for your floral design.
Pro Tip: Wait at least 2 minutes between coats for a smoother, bubble-free finish.
Sketch Basic Flower Shapes
Using your black nail art pen or a thin brush with black polish, begin drawing simple flower outlines. Start with basic shapes – small circles for flower centers with petals radiating outward.
Pro Tip: Practice the basic flower shapes on paper first to build confidence before working on your nails.
Add Stems and Leaves
Connect your flowers with delicate stems and add small leaves along the way. Keep the lines thin and flowing naturally across the nail.
Pro Tip: For leaves, create simple “V” shapes or curved lines – they don’t need to be complex to look beautiful.
Create a Cohesive Design
Extend your design across multiple nails for a cohesive look. Perhaps a main flower on your ring finger, with stems and smaller blooms flowing onto adjacent nails.
Pro Tip: You don’t need to cover every nail completely – negative space enhances the delicate nature of this design.
Seal With Top Coat
Once your line art is completely dry, apply a generous layer of top coat to seal your design and add a beautiful shine. The top coat also helps prevent your line art from chipping.
Pro Tip: Use a “floating” technique when applying top coat – don’t let the brush touch the nail art directly to avoid smudging the design.
The Beautiful Result

“A delicate botanical masterpiece that speaks volumes about your love and attention to detail.”
Creative Variations & Tips
Color Variations
-
❀
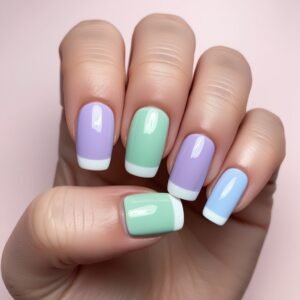
Try a soft lavender base with white floral line art for a dreamy spring look
-
❀
Opt for a pale blue base to represent mom’s calming presence
-
❀
Use mom’s favorite color as your base polish for a personalized touch
-
❀
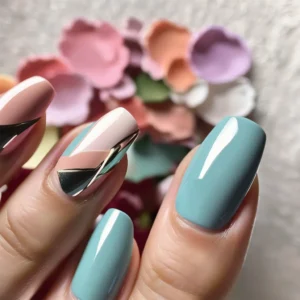
Create an ombré base by blending two complementary colors before adding your line art
Design Variations
-
❀
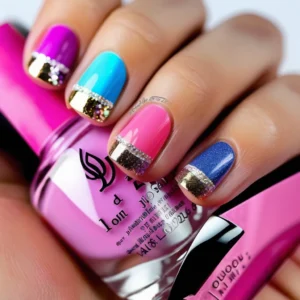
Add tiny dots of gold polish to flower centers for a touch of luxury
-
❀
Incorporate mom’s birth flower into your design for special significance
-
❀
Create an accent nail with a solid black background and white line art for dramatic contrast
-
❀
Add the word “Mom” or initials in delicate script on one accent nail
Troubleshooting Common Issues
If your lines are smudging:
Make sure your base color is completely dry before drawing. You can also place your nails in ice water for 1-2 minutes to help set the polish faster.
If your lines are too thick:
Try wiping excess product from your nail art pen or brush. For very fine lines, you can also use a toothpick dipped in black polish.
If you make a mistake:
Dip a small brush or the end of a toothpick in nail polish remover to carefully erase just the error without affecting the rest of your design.
Celebrate Mom With Art That Blooms
This delicate floral nail art is more than just a beautiful manicure—it’s a thoughtful gesture that shows care and creativity. Whether you’re creating this design for yourself to celebrate being a mom, gifting a manicure session to your mother, or teaching this technique to someone special in your life, these elegant nails are sure to bloom with love.
Remember, the true beauty of handcrafted nail art lies in its uniqueness. Your lines don’t need to be perfectly symmetrical—the slight variations are what make this design charmingly authentic, just like the perfectly imperfect journey of motherhood.
Share Your Creation!
We’d love to see your Mother’s Day floral nail art creations! Tag us on social media or comment below with your photos.
“For all the times your hands have held mine, guided me, and shown me the way—this delicate artistry celebrates the beauty and strength of your gentle touch.”