Mastering Coffin French Tip Nails
The Definitive 2025 Guide
Your Complete Guide to Perfect Coffin French Tips
Welcome to the most comprehensive guide on creating beautiful coffin French tip nails in 2025. Whether you’re a beginner just starting out or a seasoned nail technician looking to refine your skills, this guide has everything you need to master this elegant, trendy nail style.
Explore each section at your own pace by clicking on any card below. Each section provides in-depth information, professional techniques, and visual demonstrations to help you perfect your craft.
Introduction
Discover why coffin French tips are dominating 2025 trends and how this classic style has evolved into today’s must-have manicure.
Understanding Fundamentals
Learn what makes coffin nails unique, how they evolved, and why they’re the perfect canvas for French tips.
Essential Tools & Materials
Explore the professional tools and products you need, from beginner-friendly options to premium investments.
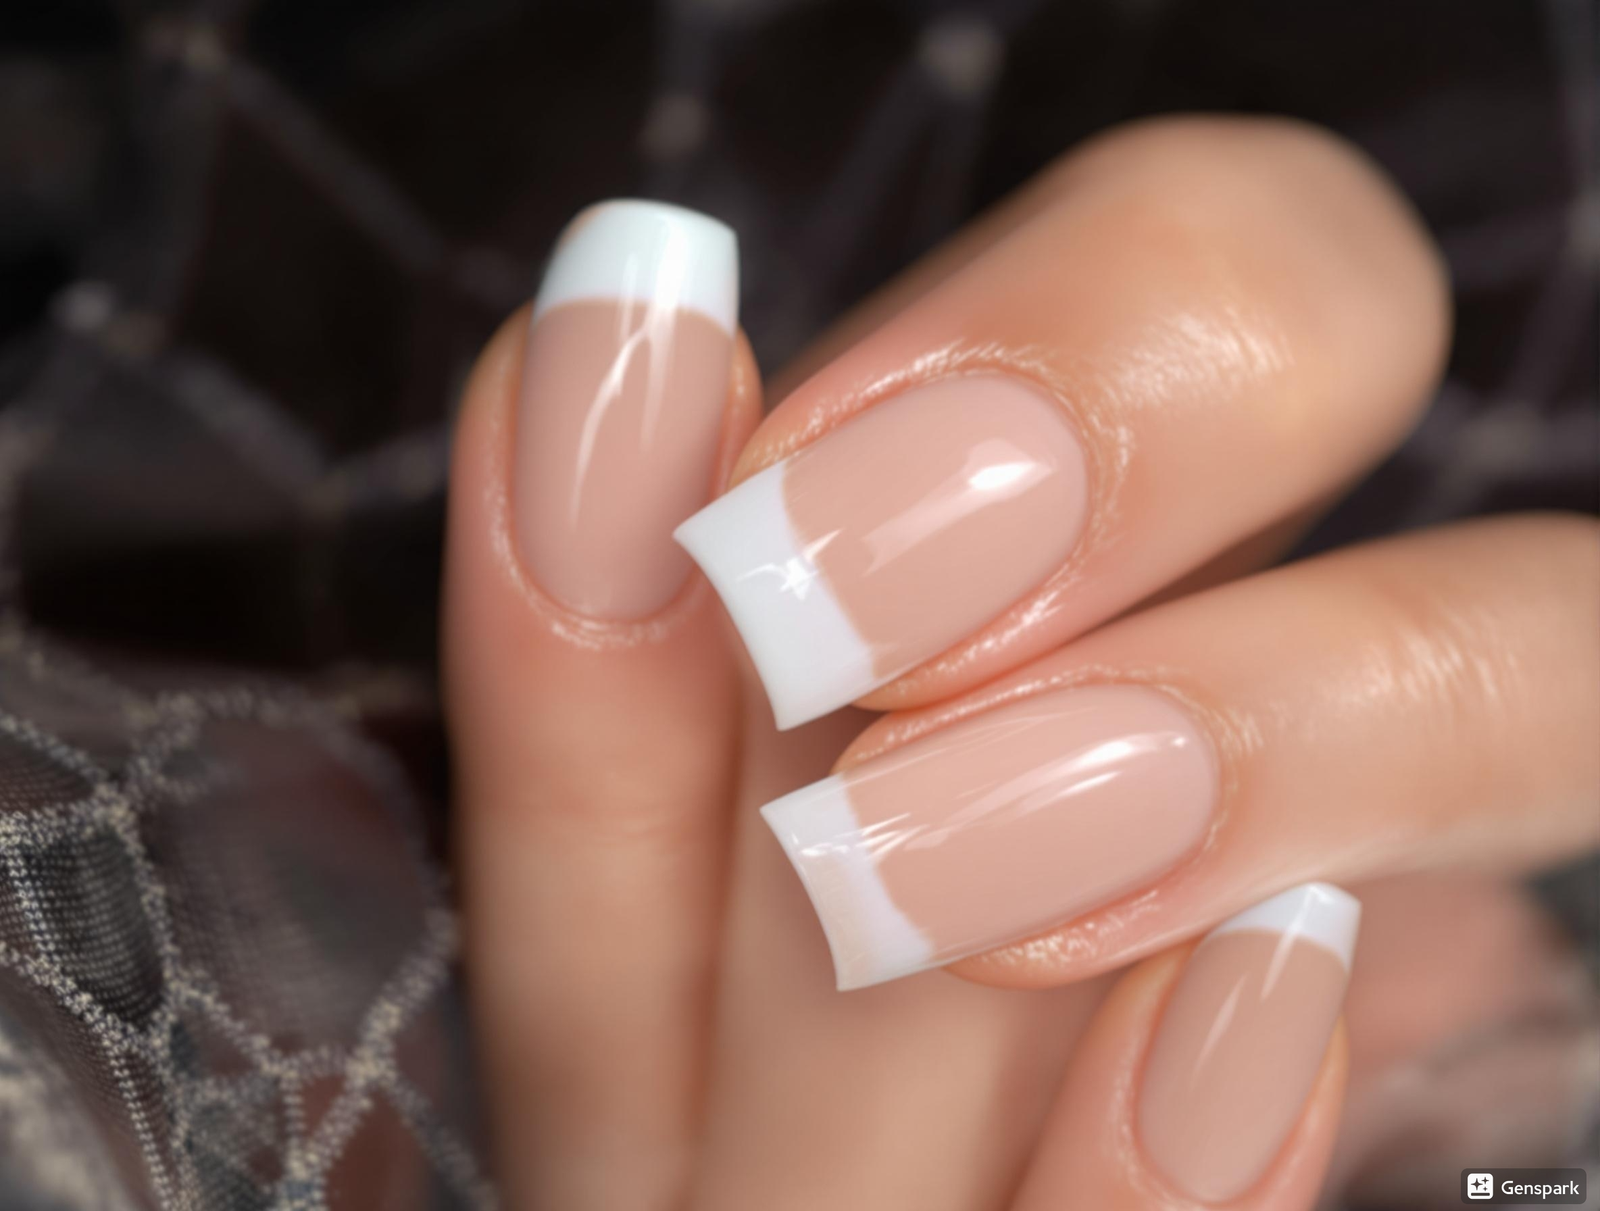
Nail Preparation
Master the crucial steps of proper nail prep, cuticle management, and creating the perfect coffin shape.

Creating Basic Coffin French Tips
Follow step-by-step methods for creating flawless French tips using various techniques for perfect results every time.

Advanced Techniques
Elevate your skills with salon-quality techniques for smile lines, proportions, ombré effects, and dimensional designs.
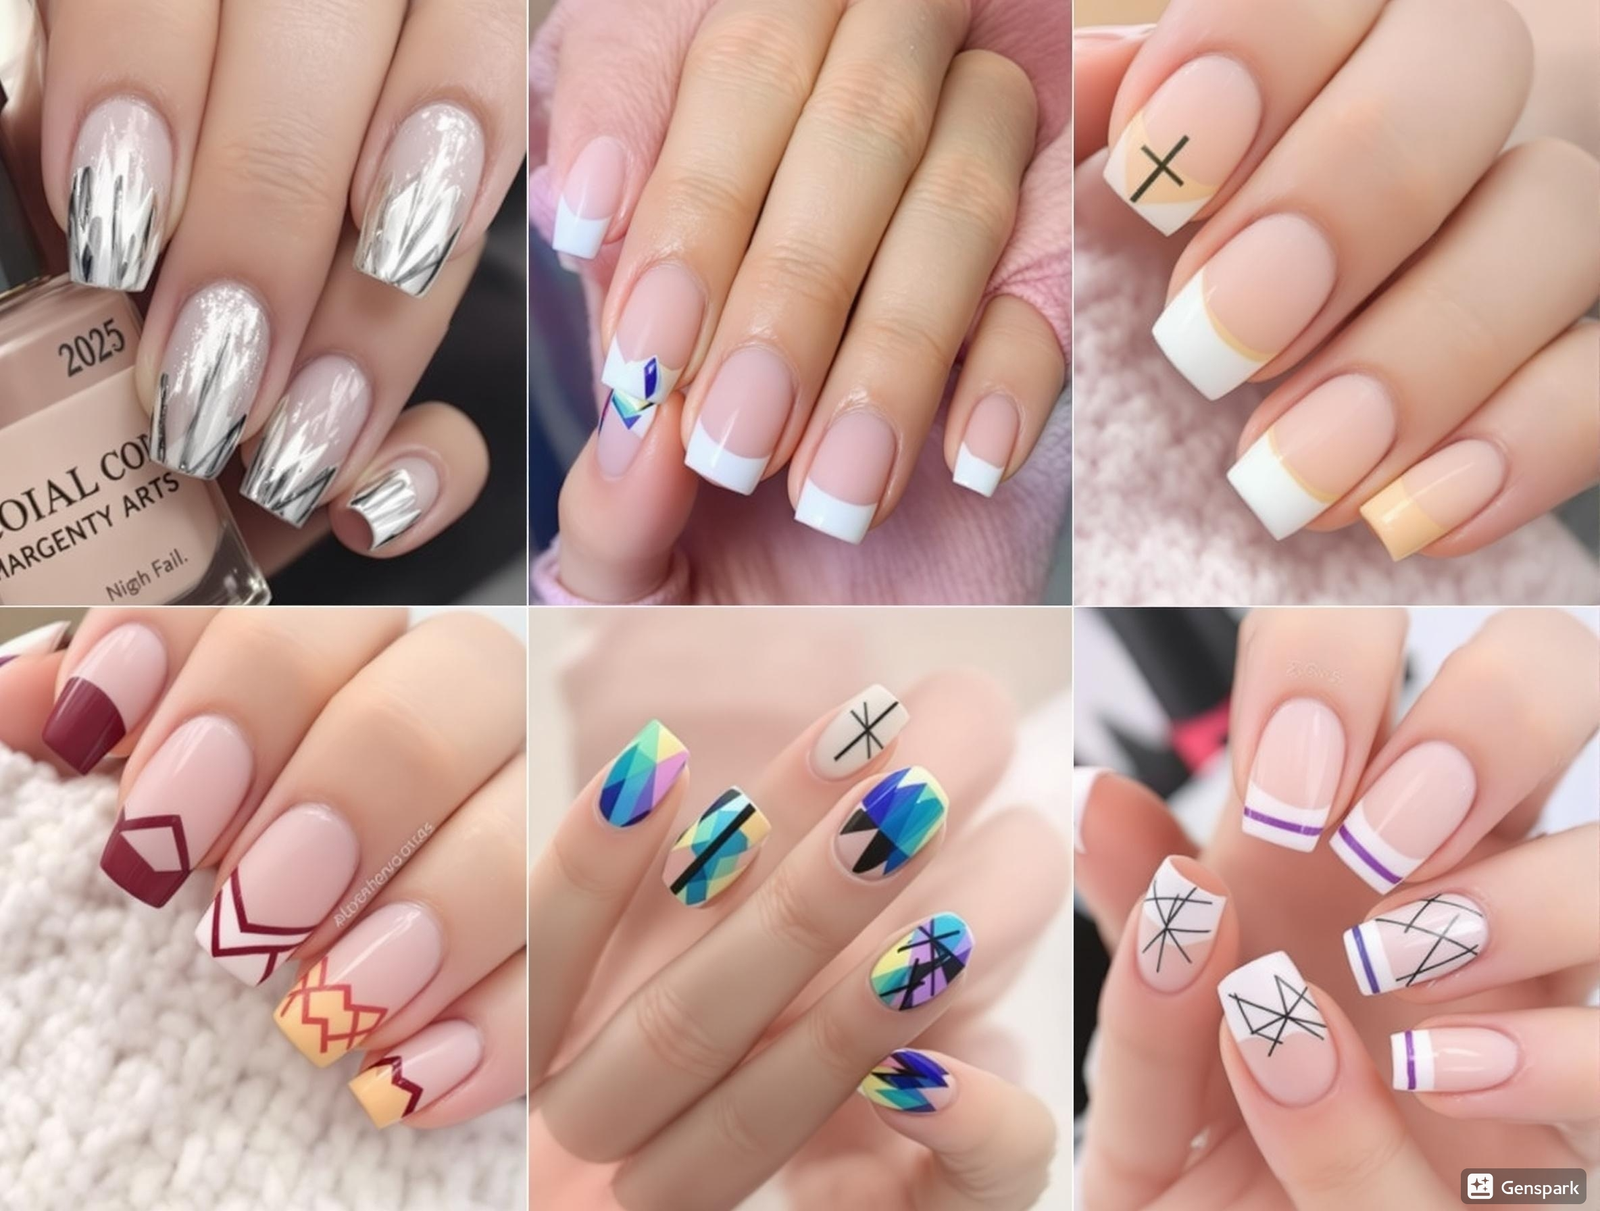
2025’s Hottest Trends
Stay ahead with chrome tips, minimalist designs, glow trends, and geometric styles that are defining 2025 nail fashion.
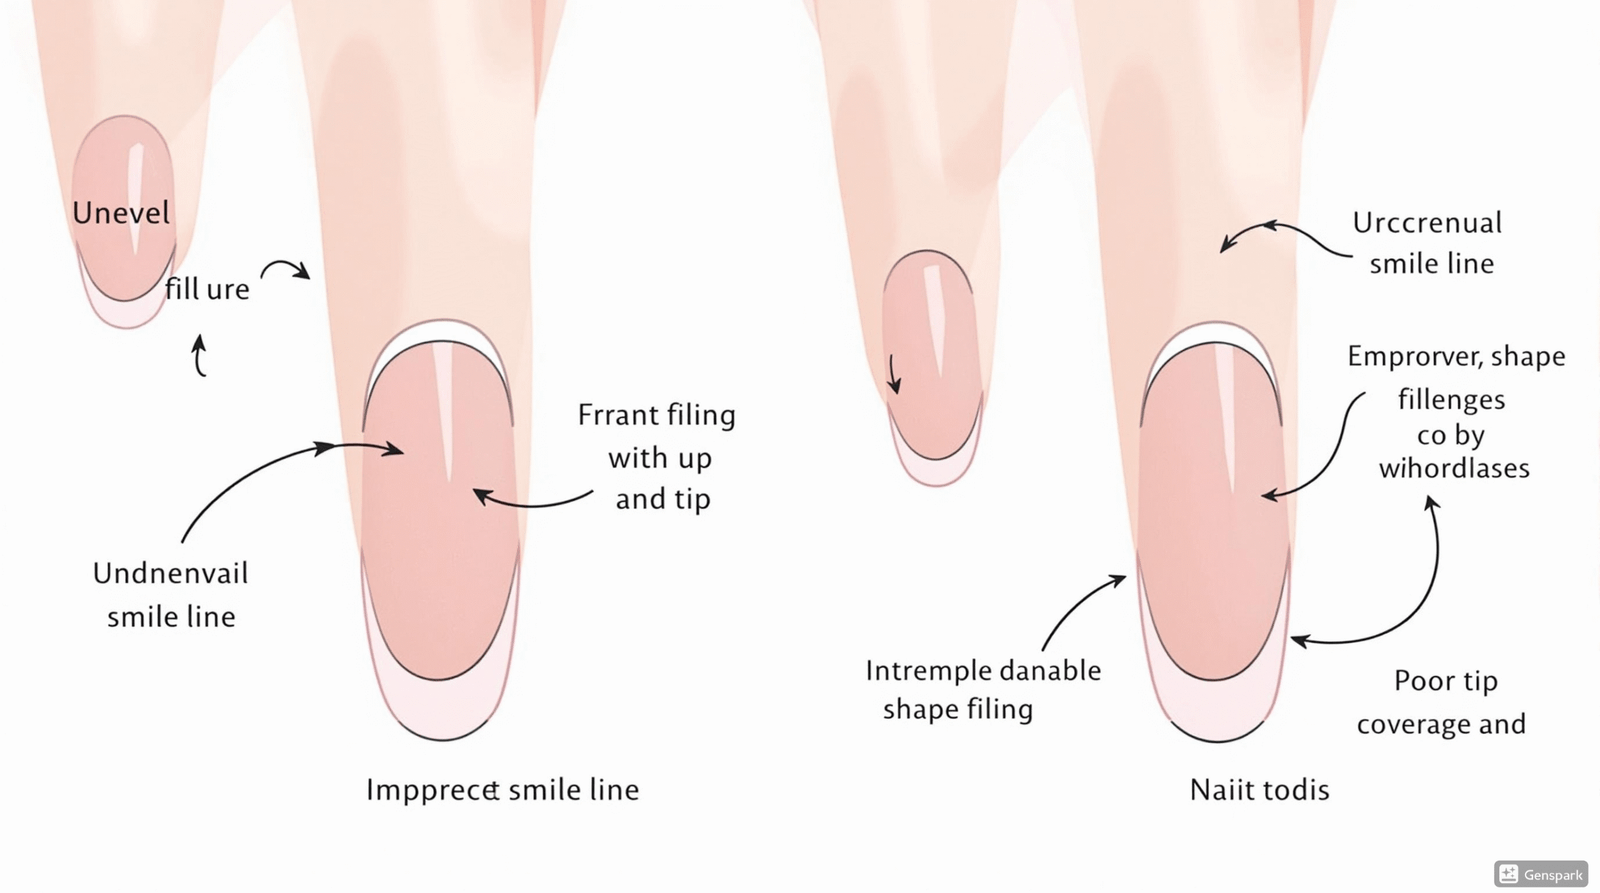
Common Mistakes
Learn to identify and correct typical errors from filing angles to smile lines, with prevention strategies for flawless results.
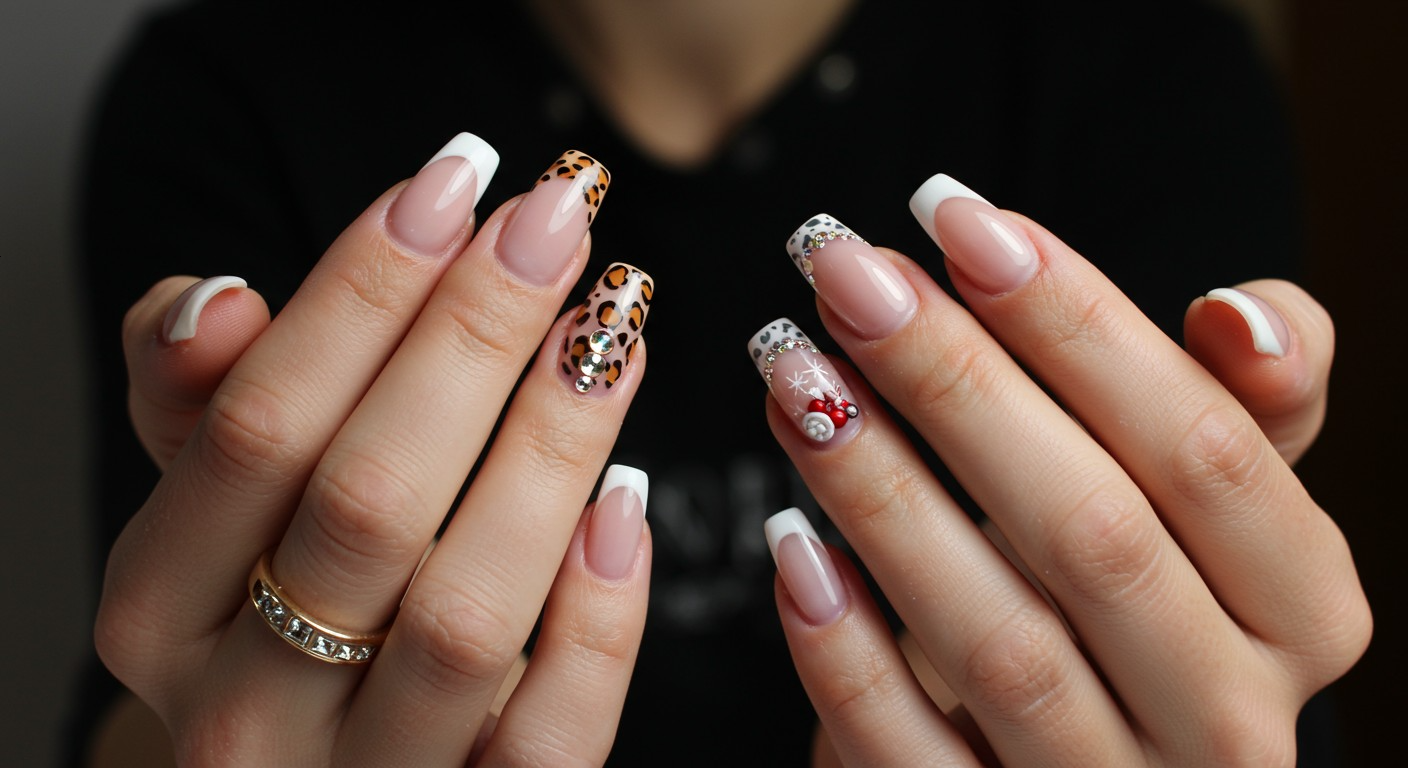
Maintaining Your Tips
Discover weekly maintenance routines, touch-up techniques, and special care tips for long-lasting, beautiful results.

Inspiration Gallery
Browse stunning designs for everyday wear, special occasions, seasonal trends, and celebrity-inspired looks to spark your creativity.

Expert Interview Insights
Learn from industry professionals sharing their secrets, forecasts for future trends, and innovations in nail art materials.
Conclusion
Reflect on your French tip journey from beginner to pro, and discover how mastering this technique can transform your nail game.

Resources & References
Access a curated list of recommended products, educational channels, troubleshooting guides, and downloadable templates.
Mastering Coffin French Tips

Introduction
The foundation of your French tip journey
The Resurgence of the Classic French Manicure in Modern Nail Art
The classic French manicure, once considered dated by many fashion critics, has made a remarkable comeback in the nail industry. Its resurgence showcases how timeless techniques can be reimagined to fit contemporary aesthetics. In 2025, we’re seeing a reimagined version that maintains the clean, sophisticated look of the original while incorporating modern elements that speak to today’s fashion-forward clientele.
This revival isn’t simply nostalgia—it’s a refined evolution. The traditional pink-and-white combination has expanded to include subtle variations in both base colors and tip designs, while maintaining the signature contrast that makes French tips instantly recognizable. Today’s French manicure celebrates precision craftsmanship while embracing personalization and artistic expression.
Why Coffin French Tips Are Dominating 2025 Nail Trends
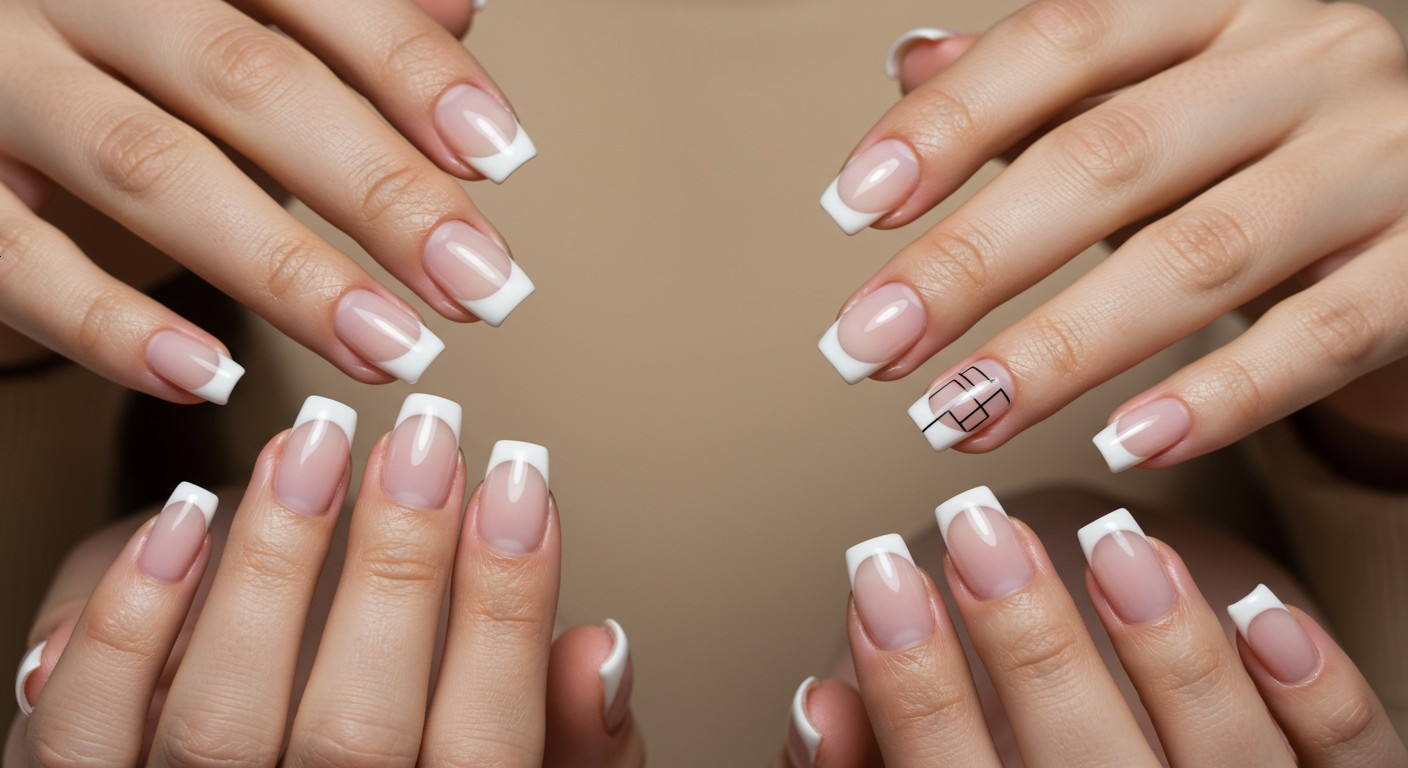
The coffin shape—with its tapered sides and flat tip—has proven to be the perfect canvas for the modern French tip. This shape dominates 2025 trends for several key reasons:
- Balanced aesthetics – The coffin shape offers enough length to showcase the French tip while maintaining practicality
- Versatility – Works beautifully with both traditional and modern interpretations of the French tip
- Celebrity influence – Adopted by major fashion icons and nail influencers globally
- Photogenic quality – Creates a perfect frame for social media-worthy nail content
- Elegance with edge – Combines sophisticated elegance with contemporary boldness
Who This Guide Is For
Beginners
New to nail art or French tips? This guide provides foundational knowledge and step-by-step instructions to help you master the basics with confidence.
DIY Enthusiasts
Learn professional techniques to create salon-quality results at home. Save money while achieving stunning French tips on your coffin-shaped nails.
Professional Nail Techs
Discover advanced techniques, current trends, and efficiency tips to elevate your French tip services and expand your repertoire.
What Sets This Guide Apart from Others
This isn’t just another nail tutorial. Our guide stands out through:
Research-Backed Techniques
Methods drawn from extensive analysis of professional nail artists’ work and client satisfaction data.
Trend Analysis
Insights into 2025’s hottest coffin French tip trends based on social media analytics and runway appearances.
Problem-Solving Approach
Common issues addressed with practical solutions that work in real-world settings.
Hand-Specific Customization
Tailored advice for different hand shapes and nail beds to ensure your French tips flatter your unique features.
Ready to Transform Your Nail Game?
Throughout this guide, you’ll discover professional insights, practical techniques, and insider tips to master the art of coffin French tips. Whether you’re creating them for yourself or for clients, you’ll learn how to achieve flawless, long-lasting results that stand out from the crowd.
Understanding Fundamentals

Understanding Fundamentals
The essential building blocks for perfect coffin French tips
What Exactly Are Coffin Nails?
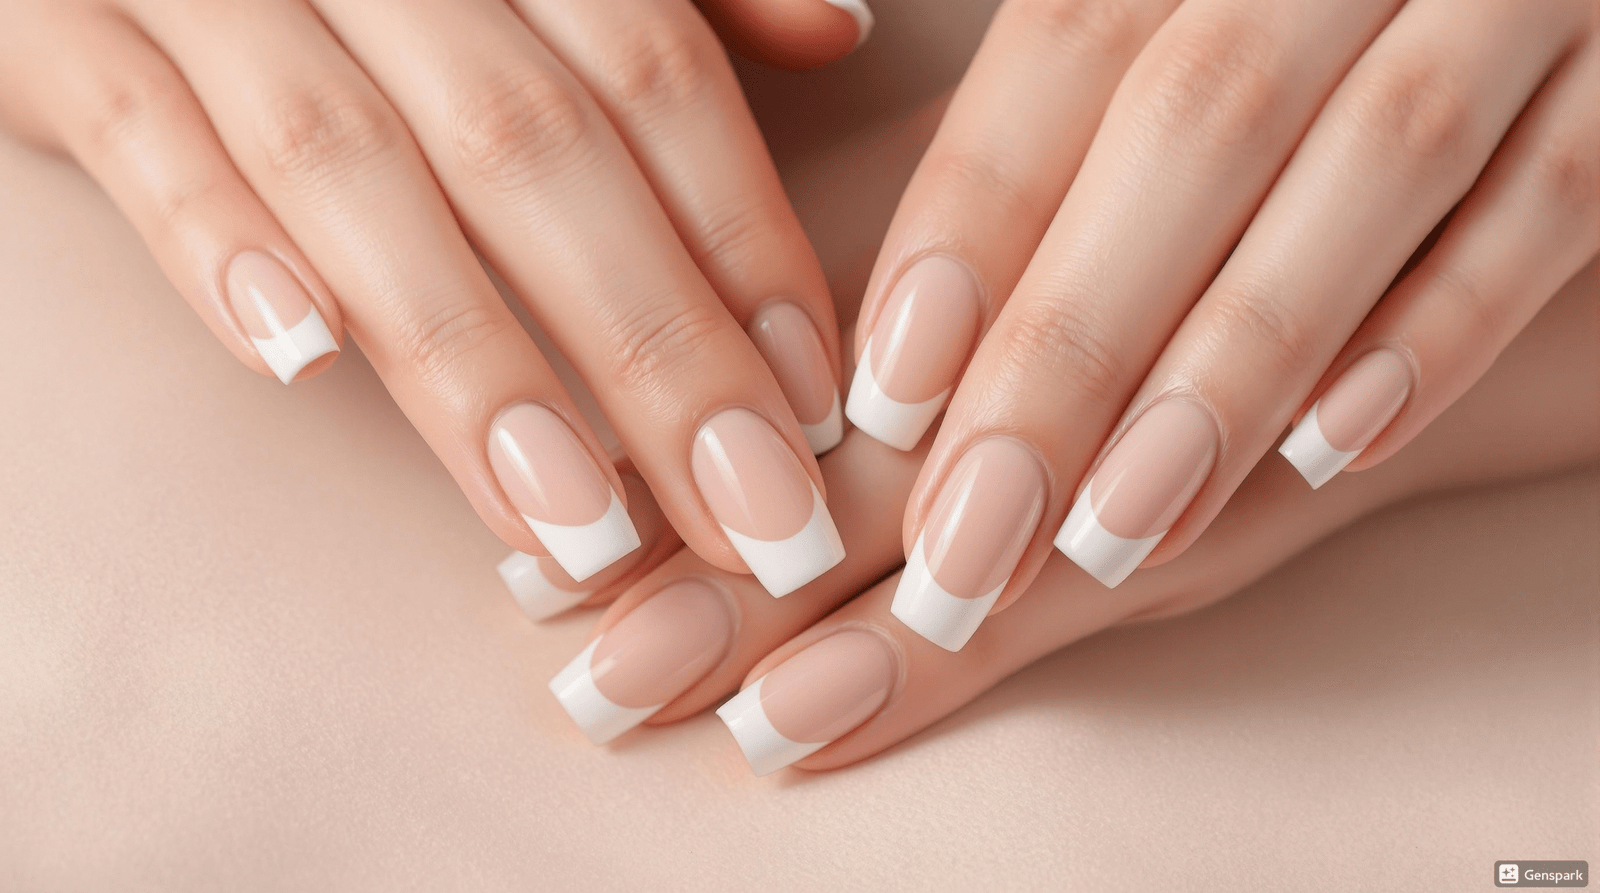
Coffin nails (also known as ballerina nails) are characterized by their distinct tapered shape that flares out from the nail bed before coming to a flat, squared-off tip. The name “coffin” comes from the resemblance to the shape of a coffin, while “ballerina” refers to the similarity to a ballerina’s pointe shoes.
Unlike round, oval, or almond shapes, coffin nails create a bold and dramatic statement while maintaining a feminine elegance. They offer a substantial canvas for nail art while their flat tip provides stability that pointy shapes like stiletto nails lack.
- Starts narrow at the nail bed
- Tapers outward along the sides
- Ends with a flat, squared-off tip
- Creates the appearance of longer, slenderer fingers

The Evolution of French Tips on Coffin Nails
The French manicure originated in the 1970s, created by Jeff Pink, founder of ORLY. Originally featuring a natural pink or beige base with bright white tips on a shorter, rounded nail, it was designed to be versatile enough to complement any outfit or occasion.
“The French tip has evolved from the traditional round shape to adaptations on every nail shape imaginable. But when paired with the coffin nail, it creates a perfect marriage of classic elegance and modern edge that has captivated the nail industry.” —Renowned nail artist Nina Takahashi
The timeline of evolution:
1970s – 1990s
Traditional round French tips dominated—short, subtle, and understated
2000s – 2010s
Square French tips gained popularity with longer extensions
2015 – 2020
Coffin shape emerged as celebrities embraced the edgier look
2020 – 2025
French coffin nails exploded with creative variations and techniques
Why This Combination Works So Well
The coffin French tip creates a perfect balance between classic sophistication and contemporary edge. This combination works exceptionally well for several reasons:
Aesthetic Balance
The angular lines of the coffin shape create visual interest, while the soft curve of the French smile line adds femininity and elegance. This contrast makes the design both striking and sophisticated.
Elongating Effect
The vertical lines of the coffin shape naturally elongate the fingers, while the horizontal line of the French tip creates the illusion of width at the nail bed, resulting in perfectly balanced proportions.
Versatility
The clean lines of both the coffin shape and French tip provide an ideal foundation for additional nail art, embellishments, or can be left minimal for an understated elegance.
Durability
The flat tip of the coffin shape provides more stability than pointed shapes, reducing the risk of breakage, while the French tip design disguises grow-out, extending the life of the manicure.
Ideal Nail Length and Natural Nail Health Requirements
Short Coffin
0.5-1 cm extension past fingertip
Perfect for beginners, active lifestyles, and professional settings. Requires less maintenance and is less prone to breakage.
Medium Coffin
1-1.5 cm extension past fingertip
The most versatile and popular length. Balances style with practicality and works for most hand types.
Long Coffin
1.5+ cm extension past fingertip
Statement length with dramatic effect. Requires strong natural nails or reinforcement with acrylics/hard gel and regular maintenance.
Natural Nail Health Prerequisites
- Strong, non-splitting nails – Nails should be strong enough to support the extension without excessive bending
- Healthy nail beds – Free from infections, severe ridges, or damage
- Well-maintained cuticles – Proper cuticle care ensures better adhesion and a cleaner look
- Appropriate nail thickness – Very thin nails may require additional strengthening treatments before application
Pro Tip
If your natural nails are weak or damaged, consider using a builder gel or a strengthening base coat before attempting coffin French tips. For very active individuals or those new to longer nails, start with a shorter coffin shape and gradually increase the length as you become accustomed to them.
Understanding these fundamental aspects of coffin French tip nails will provide a solid foundation as we progress into the techniques and materials needed to create this sophisticated nail style. In the next section, we’ll explore the essential tools and materials required to achieve salon-quality coffin French tips at home.
Mastering Coffin French Tip Nails
Essential Tools & Materials: Setting Yourself Up for Success

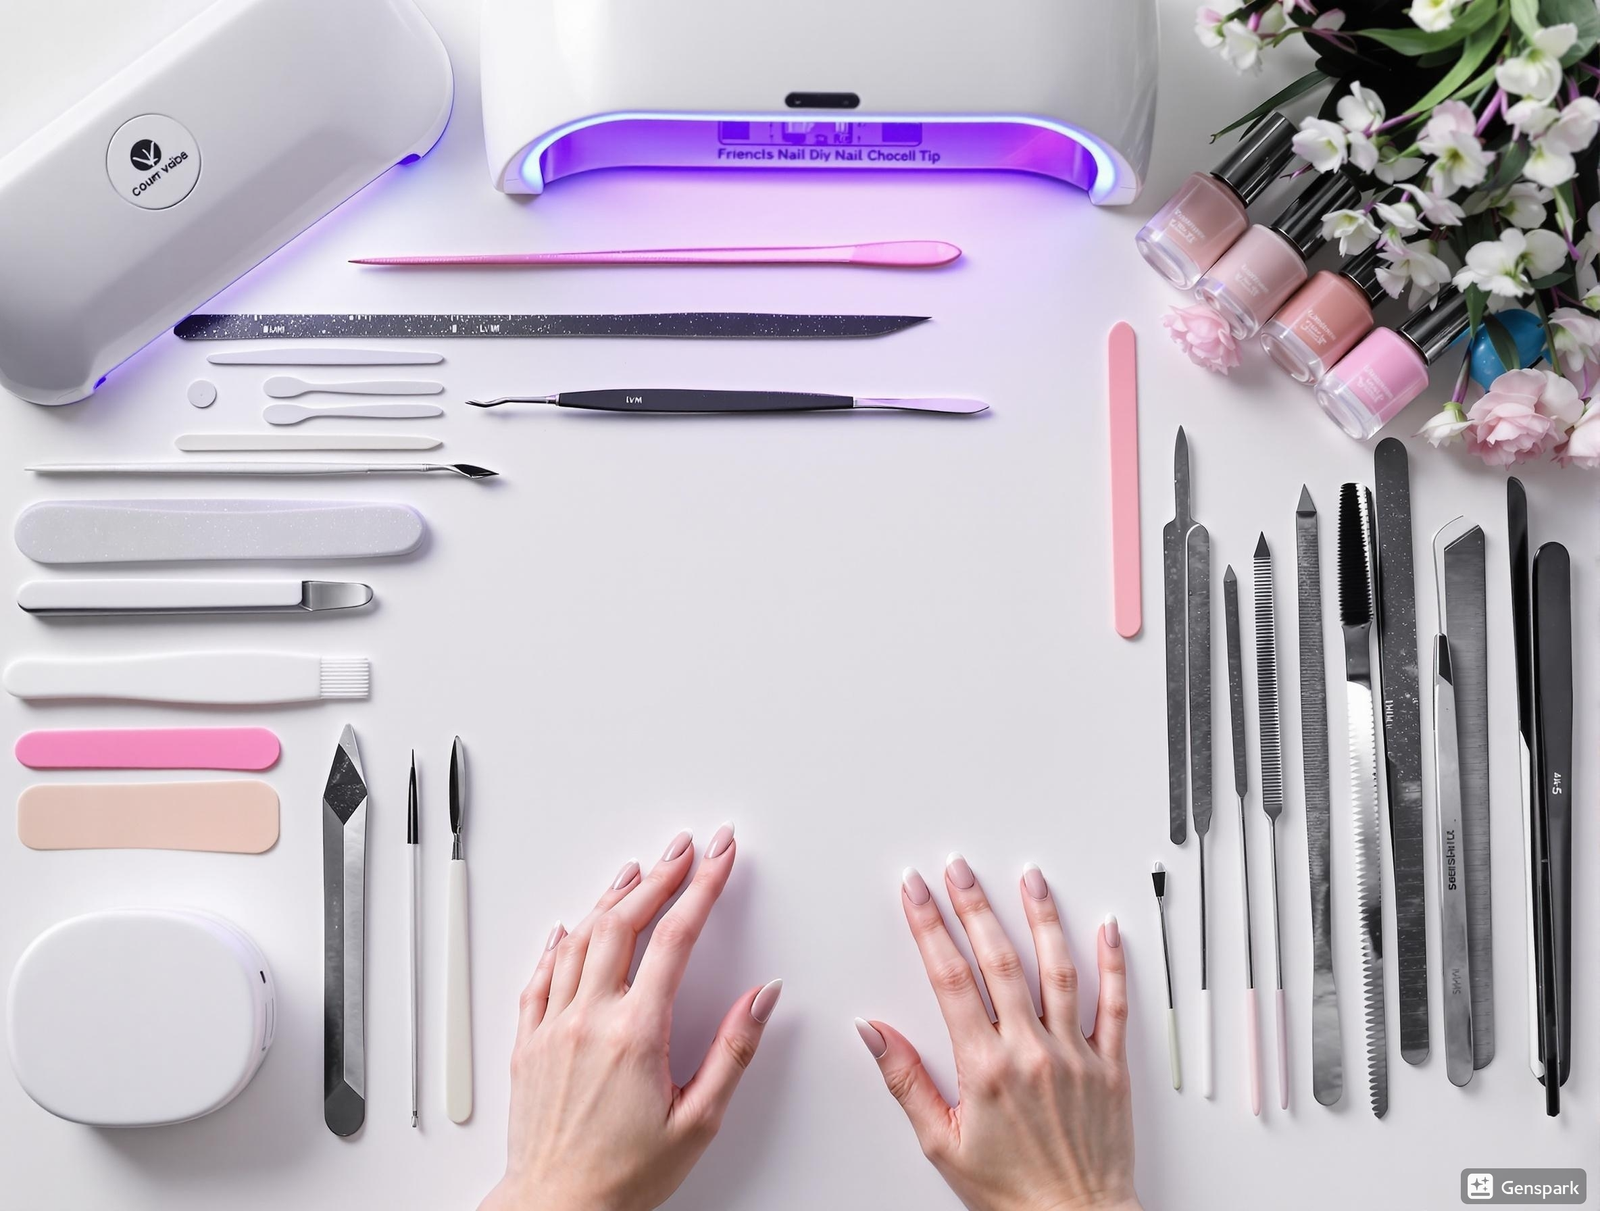
Professional-grade tools arranged for creating perfect coffin French tips
Professional-Grade vs. Beginner-Friendly Options
When starting your nail journey, it’s essential to understand the difference between professional-grade and beginner-friendly tools. While professional tools offer superior quality and durability, they often come with a higher price tag and steeper learning curve. For beginners, there are excellent starter options that balance quality with affordability.
Professional-Grade Benefits:
- Superior durability and longevity
- Better precision for detailed work
- Higher quality materials prevent lifting and breaking
- Advanced features for efficiency
- Better ergonomics for extended use
Beginner-Friendly Advantages:
- More affordable initial investment
- Less intimidating to learn with
- Often includes helpful guides
- Allows exploration before major investment
- Many all-in-one kits available
The good news? Many mid-range tools strike an excellent balance between quality and price, perfect for those serious about improving their nail skills without breaking the bank. As your skills advance, you can gradually upgrade individual tools.
The Complete Shopping List
Base Materials
| Item | Purpose | Pro Recommendation | Budget Option |
|---|---|---|---|
| Nail Tips | Extensions for creating coffin shape | CND Perfect Match or Young Nails Tips | Makartt Clear Nail Tips |
| Nail Forms | For sculpting extensions | The GelBottle Nail Forms | Gelish Reusable Forms |
| Builder Gel/Acrylic | Structure and strength | OPI Absolute or CND Retention+ | Mia Secret Acrylic System |
| Nail Glue | Securing tips | IBD 5 Second Brush-On Nail Glue | Kiss Maximum Speed Nail Glue |
| Base & Top Coat | Adhesion and protection | CND Shellac Base/Top or Gelish Foundation/Top It Off | AIMEILI Base and No-Wipe Top Coat |
Specialty Tools
French Tip Guides
Pre-cut stickers or edge guides that create perfect smile lines. Invest in flexible silicone guides for reusability.
Detailing Brushes
Thin, precise brushes (sizes 00-2) for creating clean French tips. Look for natural or synthetic sable.
French Tip Dip Container
Specialized container with angled well for dipping methods. Saves time and creates clean lines.
Stamper & Scraper
For advanced French tip stamping techniques. Look for clear jelly stampers for better visibility.
Silicone Tools
Flexible tools for creating gradient and ombré French tips. Washable and reusable.
French Tip Stencils
Reusable vinyl or silicone stencils in various smile line shapes. Great for beginners.
Premium Products Worth the Investment
- Professional E-File (Electric Nail Drill) – Makes shaping coffin nails faster and more precise
- UV/LED Lamp with 48-54W Output – Ensures proper curing for long-lasting results
- High-Quality Nail Files (100-240 grit) – Essential for creating the perfect coffin shape
- Japanese Steel Cuticle Nippers – For clean, precise cuticle preparation
- Chrome and Holographic Powders – For creating 2025’s trending French tip variations
Budget-Friendly Alternatives That Deliver
- Manual Nail Files with Multiple Grits – More affordable than e-files, just requires more time
- Compact 24-36W UV/LED Lamp – Smaller but gets the job done with longer cure times
- Dual-Ended Cuticle Pusher/Remover – Replaces multiple specialized tools
- All-in-One French Tip Kit – Contains essential basics at a lower price point
- Peel-Off Base Coat – For beginners practicing techniques (temporary but useful for learning)
Organizing Your Workspace for Efficiency
The secret to professional-level coffin French tips isn’t just in the tools—it’s also in how you organize your workspace. An efficient setup saves time and improves your results.
The Ideal Setup Includes:
- Well-lit area with natural or daylight-balanced lighting
- Comfortable chair at proper height for your table
- Nail dust collector or ventilation system
- Arm rest cushion for comfort during long sessions
- Tool organizer with sections for different categories
- Small containers for French tip powders and liquids
- Washable silicone mat to protect your work surface
- Magnifying lamp for precision work
Pro Organization Tips:
- Arrange tools in order of use for your workflow
- Keep frequently used tools within easy reach
- Use transparent containers to easily identify products
- Label everything, especially if decanted from original containers
- Create a dedicated “French tip station” with all specialized tools
- Store nail forms and guides flat to prevent warping
- Keep primer and adhesives upright and sealed when not in use
- Clean tools immediately after use for longer lifespan
Pro Tip
Consider creating a mobile organizer if you offer services at different locations. A professional nail case with removable compartments allows you to maintain your efficient setup anywhere. Always keep your most expensive tools in a separate, secure section to protect your investment.
Nail Preparation
The Foundation of Perfect French Tips
Why Preparation is the Key to Perfect Coffin French Tips
Even the most skilled nail technicians understand that exceptional French tip manicures begin long before the polish is applied. The preparation phase sets the foundation for everything that follows, determining how well your design adheres, how clean your lines will be, and ultimately how long your manicure will last.
In this section, we’ll cover the often overlooked yet critical steps that ensure your coffin French tips look professionally executed and remain beautiful for weeks.
Proper Natural Nail Care
Hydration Routine
Healthy nails require consistent hydration. Establish a daily routine of cuticle oil application followed by hand cream. This prevents the nail plate from becoming brittle, which leads to better adhesion and prevents lifting of your French tips.
Strengthening Treatment
For clients with naturally weak nails, incorporate a 2-week strengthening treatment before attempting coffin French tips. This creates a more stable base for extensions and prevents breakage that can ruin the perfect coffin shape.
Nutrition Impact
The health of natural nails is affected by nutrition. Recommend biotin supplements and foods rich in vitamins A, C, and E to clients looking to improve their nail health for better French tip results.
Proper hydration can increase adhesion strength by up to 40%
Cuticle Management Techniques
Clean, well-managed cuticles are essential for creating the perfect French tips. Excess cuticle tissue on the nail plate will cause lifting and uneven application.
The Dry Method
- Gently push back softened cuticles with a wooden pusher
- Use a cuticle nipper only for hangnails and loose skin
- Carefully buff away invisible cuticle from the nail plate
- Avoid aggressive cutting that can damage the matrix
The Soak Method
- Soak fingers in warm water with cuticle softener for 2-3 minutes
- Apply cuticle remover gel and wait 45 seconds
- Push back cuticles and remove excess with gentle scraping
- Clean and dehydrate thoroughly before proceeding
Pro Tip: The most common cause of lifting in French tips is invisible cuticle residue on the nail plate. Use a fine buffer in one direction only to remove this barrier to adhesion.
Nail Surface Preparation for Maximum Adhesion
Perfect French tips require immaculate nail plate preparation. Follow this precise sequence for maximum adhesion and longevity:
- 1 Remove all traces of old product with appropriate solvent
- 2 Shape free edge to desired coffin form using 180-grit file
- 3 Gently buff surface with 240-grit buffer to remove shine
- 4 Remove dust thoroughly with brush
- 5 Cleanse with isopropyl alcohol (91%) or nail cleanser
- 6 Apply pH balancer to neutralize nail plate
- 7 Apply non-acidic primer followed by bonding agent
The Art of Creating the Perfect Coffin Shape

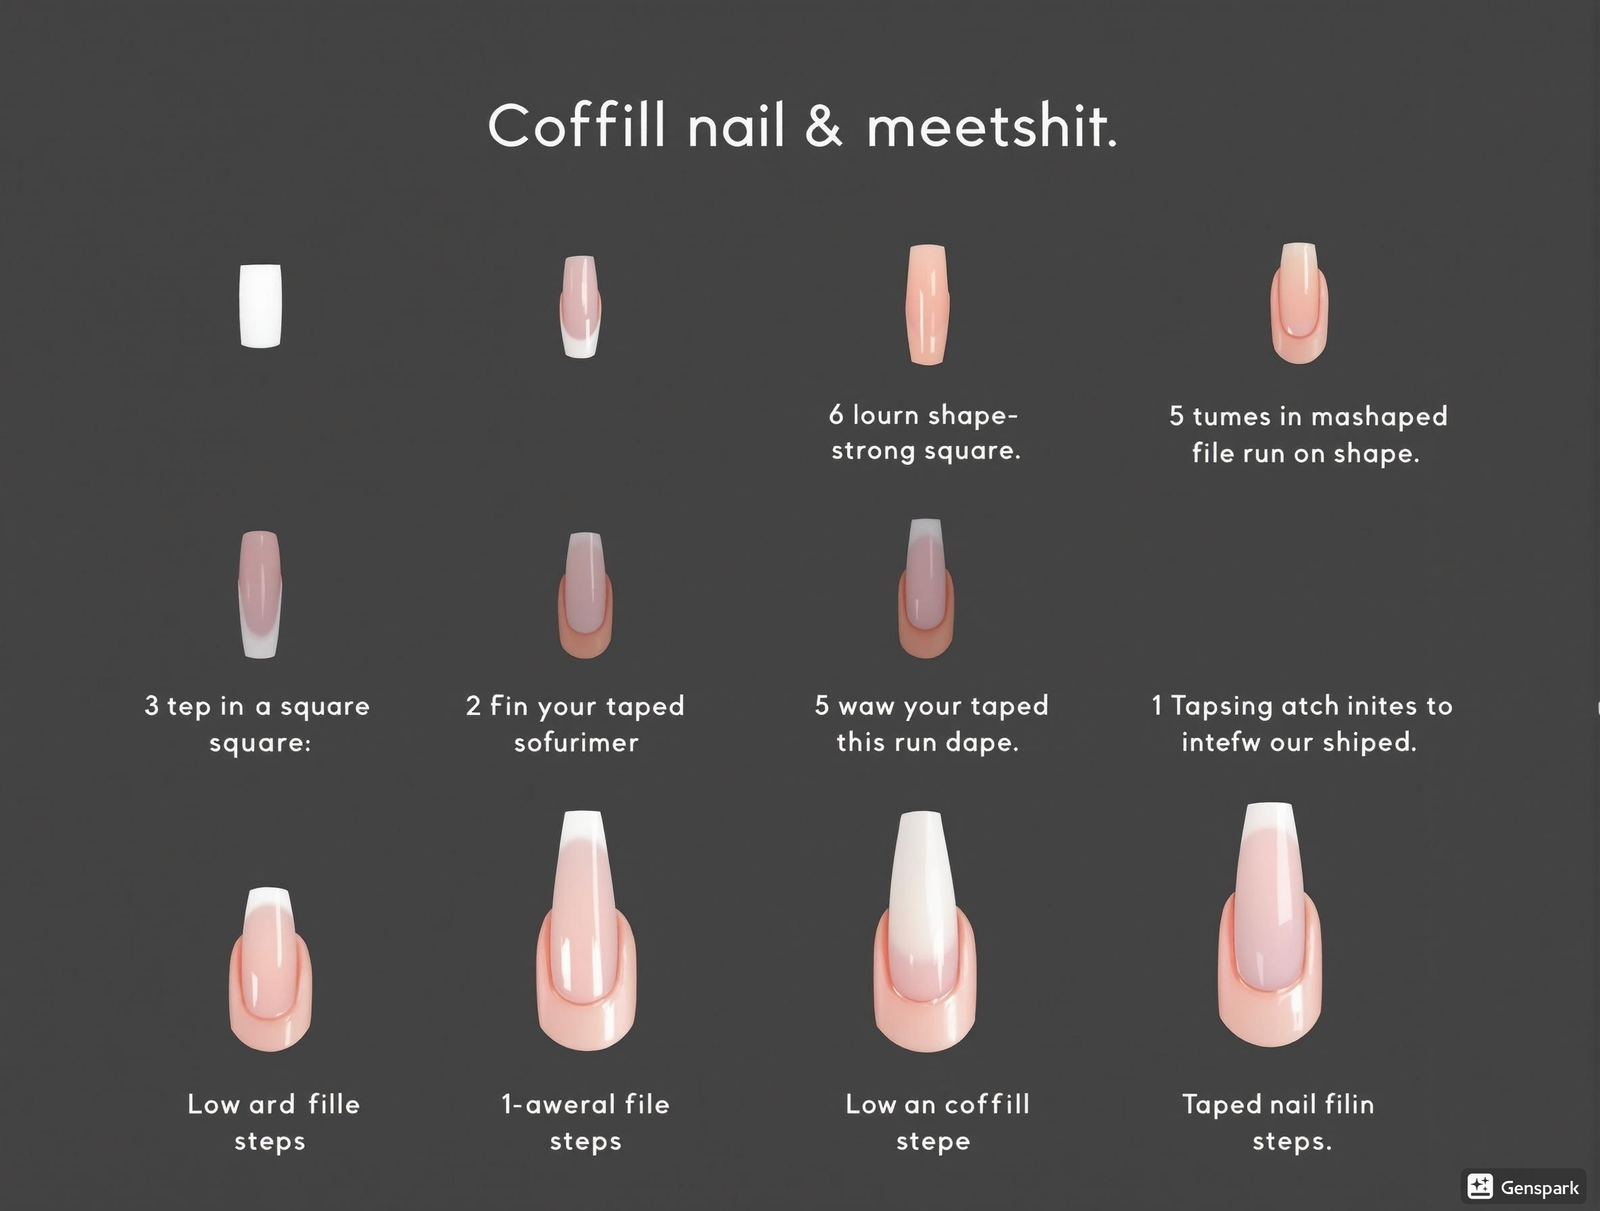
Step-by-step progression from square to perfectly tapered coffin shape
Detailed Filing Technique for Coffin Shape
Step 1: Create the Base Shape
Begin with a square shape as your foundation. File the sides perfectly straight and parallel to each other. Ensure the free edge is completely straight across with sharp corners.
Step 2: Establish Side Angles
Hold your file at a 45° angle to the side walls. File inward from each corner, creating a tapered effect. Maintain symmetry by filing the same amount from each side.
Step 3: Perfect the Flat Tip
File the free edge straight across to create the signature flat tip. The width of this flat edge should be approximately 1/3 of the width of the nail at the smile line for ideal proportions.
Step 4: Refine and Balance
Examine the nail from all angles, especially head-on and profile views. Make minor adjustments to ensure perfect symmetry. Round slightly where the tapered sides meet the flat tip to prevent snagging.
Proportion Guide: For most hand types, the ideal coffin shape maintains a length-to-width ratio of approximately 1.5:1 measured from cuticle to free edge.
Length and Shape Considerations for Your Hand Type
• Moderate length coffin shape
• More gradual taper
• Slightly narrower width
• Creates illusion of length
• Extended length acceptable
• More dramatic taper
• Narrower flat tip
• Creates slimming effect
• Medium length ideal
• Moderate taper angle
• Slightly wider flat tip
• Maintains proportion
Key Takeaways
- Meticulous nail preparation is the foundation of long-lasting French tips
- Complete cuticle removal from the nail plate prevents lifting and ensures clean lines
- The 7-step dehydration process maximizes adhesion and extends wear time
- Perfect coffin shape requires precise symmetry, proper tapering, and a flat tip
- Customize coffin shape proportions based on individual hand and finger type
Creating Basic Coffin French Tips
The Art of French Tips on Coffin Nails
Creating the perfect French tip on coffin-shaped nails requires precision, patience, and the right technique. This classic look has been modernized through its application on the trendy coffin nail shape, offering a beautiful balance of timeless elegance and contemporary edge.
In this section, we’ll explore four distinct methods for achieving salon-quality French tips on your coffin nails, each with its own advantages depending on your skill level and the tools you have available.
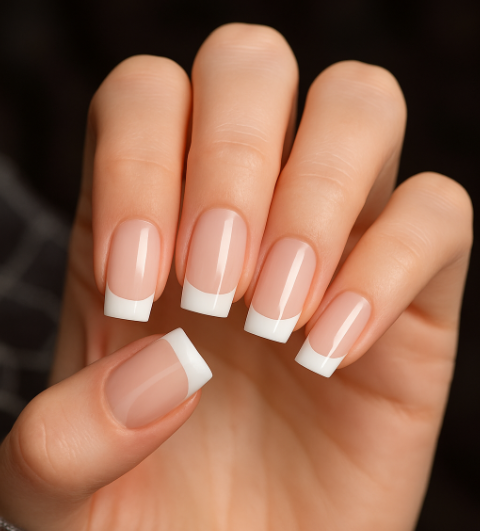
Method 1: Traditional Brush Technique for Precision
The traditional brush technique is the foundation of French tip application and is widely used by professionals for its precision and control. While it requires practice, mastering this method will give you the most refined results.
-
Prepare your workspace with all needed supplies: white gel polish, thin nail art brush, base coat, top coat, and UV/LED lamp.
-
Apply and cure your base color (typically nude or clear) on properly prepared coffin-shaped nails.
-
Dip your thin nail art brush into the white gel polish, wiping excess on the rim of the bottle.
-
Start in the middle of the nail tip, carefully drawing a curved “smile line” from one side to the other.
-
Fill in the area from the smile line to the tip of the nail with the white gel polish.
-
Cure under your UV/LED lamp according to the product specifications.
-
Apply a second coat of white if needed for opacity, then cure again.
-
Finish with a top coat over the entire nail and cure for the final time.
Pro Tips:
- Rest your pinky on a stable surface to steady your hand while drawing the smile line
- Practice the smile line motion on paper before attempting it on nails
- Use a very thin brush for the most precise smile line
- Turn the hand to get the best angle for each nail
Common Challenges:
- Uneven smile lines – practice consistent pressure and hand steadiness
- Polish spreading – ensure your brush isn’t overloaded with product
- Inconsistent thickness – maintain the same distance from the natural nail edge on each finger
Method 2: Innovative Dipping Method for Clean Lines
Best For:
- Beginners who struggle with free-hand techniques
- Those who want crisp, even smile lines
- Creating consistent French tips across all nails
Materials Needed:
- White gel polish in a small dish
- Base coat and top coat
- UV/LED lamp
- Clean-up brush and acetone
The dipping method is excellent for beginners as it creates a natural curved smile line with minimal effort. This technique produces clean, consistent French tips even if you don’t have steady hands.
-
Apply and cure your base color on coffin-shaped nails.
-
Pour a small amount of white gel polish into a shallow dish.
-
Angle your finger so that only the tip will touch the polish when dipped.
-
Gently dip the nail tip into the white gel polish at an angle, creating a natural curved line.
-
Remove any excess polish from the sides or cuticles using a clean-up brush dipped in acetone.
-
Cure under UV/LED lamp according to your product specifications.
-
Apply top coat over the entire nail and cure for the final time.
Method 3: Using French Tip Guides and Tools
French tip guides are adhesive stencils specifically designed to create perfect smile lines. They’re ideal for beginners and professionals alike who want consistent, precise French tips with minimal effort.
-
Apply and cure your base color on properly prepared coffin-shaped nails.
-
Select French tip guides that match the width of your coffin nail tips.
-
Carefully place the guide on the nail, ensuring it follows the desired smile line shape.
-
Press down firmly on the guide to ensure there are no gaps where the polish could seep under.
-
Apply white gel polish to the exposed tip area of the nail.
-
Carefully remove the guide before curing (unless the guide is specified as cure-safe).
-
Cure under UV/LED lamp according to your product specifications.
-
Apply a second coat of white if needed for opacity, then cure again.
-
Finish with a top coat over the entire nail and cure for the final time.

Method 4: The “Reverse” French Tip Technique
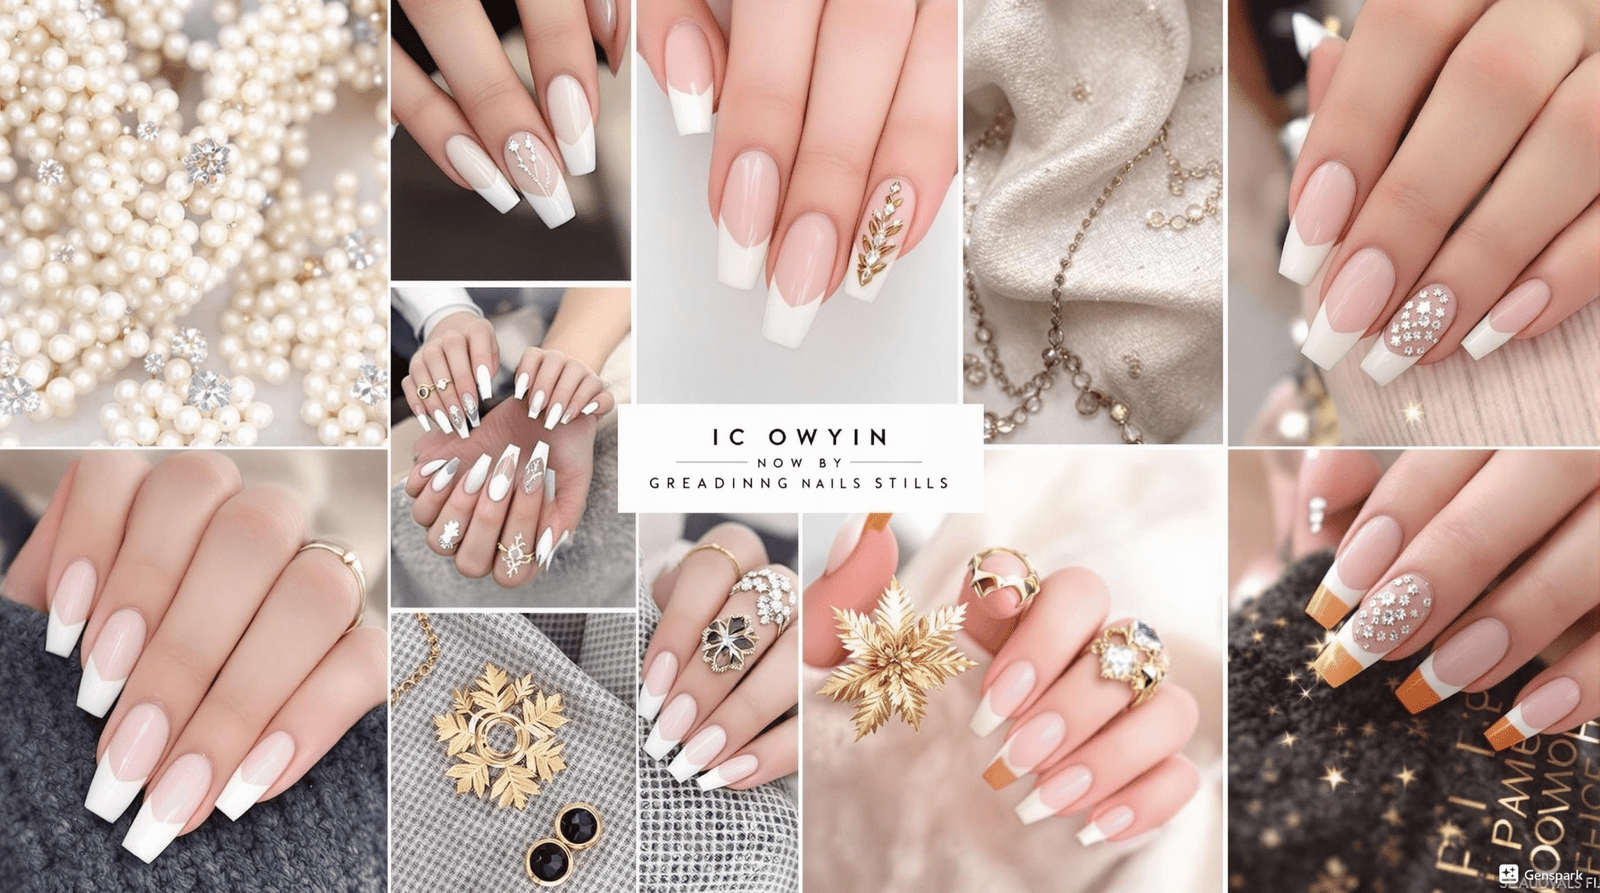
The reverse French technique flips the traditional process by applying white polish to the entire nail first, then adding the nude color to create the smile line. This method can be easier for those who struggle with drawing precise lines.
-
Apply base coat to properly prepared coffin-shaped nails and cure.
-
Apply white gel polish to the entire nail and cure.
-
Apply a second coat of white if needed for full opacity and cure again.
-
Using a curved nail art brush, apply your nude/base color starting from the cuticle, creating the smile line as you go.
-
Fill in the area from the cuticle to the smile line with the nude color.
-
Cure under UV/LED lamp according to your product specifications.
-
Apply a second coat of the nude color if needed for opacity, then cure again.
-
Finish with a top coat over the entire nail and cure for the final time.
Troubleshooting Common Application Issues
Problem: Uneven Smile Lines
Uneven smile lines are one of the most common issues when creating French tips, especially on coffin-shaped nails where the flat tip requires careful attention to proportions.
Solutions:
- Practice the smile line motion repeatedly on a practice palette
- Use French tip guides for consistent results
- Mark the center point of each nail before starting
- Work in good lighting to see clearly
- If using the free-hand method, start from the center and work outward to each side
Problem: Bleeding Color
When the white polish bleeds into the base color, it can ruin the clean line that defines a French manicure.
Solutions:
- Ensure the base color is completely cured before applying white
- Use a less viscous white gel polish that doesn’t spread
- Apply white polish in thin layers rather than one thick coat
- Keep the brush relatively dry when creating the smile line
- Clean up mistakes immediately with a fine clean-up brush and acetone
Problem: Incorrect Proportions
On coffin nails, the proportion of the French tip can make or break the overall look. Too thick can look outdated, while too thin might not create enough impact.
Solutions:
- For modern coffin French tips, aim for the white tip to cover approximately 1/4 to 1/3 of the free edge
- Adjust proportions based on nail length (shorter nails look best with thinner French tips)
- Use the natural free edge as a guide, especially for beginners
- Consider using French tip guides sized appropriately for coffin shapes
- Take a step back and look at all nails together to ensure consistent proportions across the hand
Advanced Techniques
Perfect French tip on coffin shaped nails
Elevating Your French Tip Game
Taking your coffin French tips from basic to breathtaking requires mastering advanced techniques that salon professionals use. This section will guide you through the methods that set apart amateur applications from professional-quality nails.
Creating the Perfect Smile Line
The smile line is the defining characteristic of French tips. Master nail technicians know that the perfect smile line requires precision and the right technique:
- The 90° Brush Angle: Hold your brush perpendicular to the nail when creating the smile line for maximum control.
- Single Stroke Technique: The cleanest smile lines come from confident, single strokes rather than multiple small adjustments.
- Mirror Method: Create one side, then mirror the same curve on the other for perfect symmetry.
- Template Guide: Use smile line stickers or custom-cut tape guides for consistently perfect curves.
Pro Tip: For coffin shapes, the smile line should be slightly elongated compared to standard ovals, extending further up the sides of the nail to accentuate the tapered coffin shape.

Correct vs incorrect smile line techniques
Balancing Proportions for Your Nail Length

Proper proportions for coffin shapes
The secret to elegant coffin French tips lies in proper proportions. Professional nail artists follow these guidelines:
- 1/3 Rule: For standard French tips, the white tip should cover approximately 1/3 of the visible nail.
- Length-Based Adjustments: Longer coffin nails (over 1 inch) need proportionally longer white tips to maintain balance.
- Width Considerations: The white tip should be slightly narrower at the free edge than the width of the nail bed to enhance the tapered look of coffin nails.
- Client Hand Size Adjustments: Clients with smaller hands benefit from slightly smaller French tips to maintain elegance.
Pro Tip: Take a photo of your client’s preferred French tip proportion and keep it in their file for consistent results at every appointment.
Gradient and Ombré French Tips: 2025’s Trend
Traditional stark-white French tips are evolving into subtle gradient effects that add dimension and sophistication:
- Sponge Gradient Method: Apply white polish to a makeup sponge and dab it onto the nail tip, gradually building the color intensity.
- Dual Brush Technique: Apply white polish at the tip, then use a clean, dry brush to pull and blend the color downward.
- Color Transition: For color ombré French tips, place two colors side by side and blend at the smile line for a seamless transition.
- Baby Boomer Nails: The most popular gradient French style, transitioning from pink at the base to white at the tip.
Pro Tip: For the most natural-looking gradient, incorporate a third, intermediate shade between your base color and tip color.

Gradient and ombré French tip variations
Working with Builder Gels for Strength and Longevity
Builder gels are a salon professional’s secret weapon for creating durable, long-lasting coffin French tips that resist lifting and breakage:
Hard Builder Gels
- Provide maximum structural support
- Ideal for length extensions
- Create perfect coffin shape apex
- Require precise application technique
- Curing time: 60-120 seconds LED
Soft Builder Gels
- More flexible and forgiving
- Self-leveling properties
- Easier to apply for beginners
- Great for overlay applications
- Curing time: 30-60 seconds LED
Perfect French Tip Builder Application: Apply a thin layer of builder gel across the entire nail, then a second layer focused on creating a stress point at 1/3 from the cuticle. For the white tip, apply builder directly to the free edge and extend it to create your smile line before curing.
Pro Tip: Add a drop of white gel color to clear builder gel for a natural-looking, sheer white French tip that won’t appear chalky or opaque.
Encapsulation Techniques for Dimensional French Tips

Dimensional encapsulated designs
Encapsulation elevates French tips by adding dimension and custom elements sealed within the nail structure:
- 3D French Lines: Create raised smile lines by building up white gel in layers.
- Metallic Elements: Place thin metallic foils along the smile line before encapsulating.
- Glitter Gradients: Apply fine glitter in a gradient at the tip, sealed between gel layers.
- Double French: Create one French line, encapsulate, then add a second line in a different color or style.
- Crystal Placement: Set micro-crystals along the smile line, then encapsulate for a smooth surface with embedded sparkle.
Encapsulation Process:
- Apply a base layer of builder gel and cure
- Create your French tip design
- Add dimensional elements while gel is still tacky
- Apply a thin clear builder gel layer over elements
- Cure, then shape and file as needed
- Apply final top coat for maximum shine
Pro Tip: For the cleanest encapsulation, use a thin brush dipped in alcohol to perfect the placement of elements before curing.
Key Takeaways for Salon-Quality Results
- Practice smile line techniques on nail tips before applying to clients
- Keep builder gels at room temperature for optimal consistency
- Invest in quality brushes specifically designed for French tips
- Always cap the free edge to prevent lifting
- Consider each client’s lifestyle when recommending French tip styles
- Document successful techniques in a personal lookbook for reference
2025’s Hottest Trends
2025’s Hottest Coffin French Tip Trends
Stay ahead with the most stylish and innovative nail designs

French tips have evolved far beyond the classic white smile line. As we move through 2025, nail artists are pushing creative boundaries with innovative takes on the traditional French manicure. Coffin shaped nails, with their elegant tapered form and flat tips, provide the perfect canvas for these modern interpretations.
In this guide, we’ll explore the trendiest coffin French tip variations that are dominating 2025’s nail scene. From subtle and sophisticated to bold and artistic, these designs will inspire your next manicure and keep you at the forefront of nail fashion.
Chrome & Metallic French Tips
The luxury trend dominating 2025 features high-shine chrome and metallic finishes that add an instant touch of glamour to the traditional French tip. Unlike conventional white tips, these reflective finishes create a futuristic, multi-dimensional look that catches the light with every movement.
How to Achieve This Look:
- Start with a perfectly shaped coffin nail base
- Apply a neutral base coat across the entire nail
- Create your French tip outline using a thin brush
- Apply chrome powder only to the tip area using a silicone tool
- Seal with a no-wipe top coat designed for chrome finishes
“Chrome French tips are the most requested luxury nail trend in my salon this season. Clients love the versatility—silver for a modern look, gold for elegance, or rose gold for a softer approach.” —Celebrity Nail Artist

Chrome French Tip Elegance

Subtle Micro-French Elegance
Minimalist Micro-French Tips
The “less is more” philosophy has reached French manicures with micro-French tips becoming one of 2025’s most sophisticated trends. These ultra-thin lines—often just 1-2mm in width—create a delicate, barely-there effect that’s perfect for the modern minimalist.
Styling Variations:
- Classic white micro-tips for a refined, professional look
- Double micro-lines for added dimension
- Negative space designs with thin French outlines
- Asymmetrical micro-tips for an artistic touch
Designer Tip:
Use a precision thin brush or French tip stickers cut to size for the cleanest lines. The key to this trend is precision and symmetry.
Glow French Nail Trend
The celebrity-favorite trend that’s illuminating 2025’s nail scene combines the elegant structure of coffin French tips with luminous, light-reactive pigments.
Types of Glow Effects:
- UV Glow – Tips that illuminate under black light for nightlife appeal
- Phosphorescent – Tips that charge in light and glow in darkness
- Iridescent – Tips with color-shifting properties that change in different light angles
- Thermal – Temperature-reactive tips that change color with heat
Application Tips:
Glow effects require special pigments and careful application:
- Apply a white or light-colored base to enhance glow visibility
- Mix glow pigment with clear gel for custom intensity
- Apply in thin layers rather than one thick coat
- Seal with a non-yellowing top coat to preserve effect
- Consider a matte top coat for daytime subtlety
“Glow French tips are the perfect day-to-night nail design. They look elegant and subtle during the day, then become the center of attention when the lights go down.” —Red Carpet Nail Artist
Geometric and Asymmetrical French Tips
Angular Tips
Sharp, geometric lines replace traditional curved smile lines for a modern, architectural look.
Side French
Asymmetrical designs where tips appear only on one side of the nail for an artistic statement.
Segmented French
Divided tip sections with negative space creating a deconstructed French manicure effect.
Why Geometric French Tips Are Trending
The rise of geometric French tips reflects 2025’s broader design trends toward clean lines and artistic expression. This style allows for personalization while maintaining the recognizable French tip structure that clients love.
Digital nail design technology has made precision geometric patterns more accessible, allowing nail technicians to execute complex designs with perfect symmetry.
Color Theory: Beyond White Tips
2025 has officially broken free from the traditional white French tip. Color theory is now central to modern French manicure design, with nail technicians applying color psychology to create mood-enhancing nail art.
Trending Color Combinations:
Same color family with tips in a darker shade than the base
Opposites on the color wheel for bold, high-contrast statements
Neighboring colors creating harmonious, subtle variations
Neutral bases with vibrant tip colors for pop effect
Expert Insight:
When selecting colored tip combinations, consider skin undertones. Warm skin tones pair beautifully with gold, coral, and peach tips, while cool undertones complement silver, blue, and purple tips.

2025 Color Trend Palette
Adding Dimension with 3D Elements
The final frontier in 2025’s coffin French tip evolution incorporates texture and dimension, transforming a flat manicure into a tactile work of art. These embellishments are strategically placed to enhance the French tip design rather than overwhelm it.
Trending 3D Elements
-
Crystal Français
Micro-crystals outlining French tips for subtle sparkle and definition
-
Pearl Tips
Tiny pearl embellishments creating texture along the smile line
-
Texture Gradients
Building gel sculpted into peaks or waves within the tip area
-
Floating Elements
Encapsulated elements inside clear tips for a suspended effect
Application Techniques
Working with dimensional elements requires precision and specialized tools:
- Use wax pencils for picking up and placing small crystals
- Apply elements before top coat but after color application
- Sandwich delicate elements between gel layers for longevity
- Create custom textures using silicone tools and builder gel
Practical Consideration:
While 3D French tips are stunning, consider your client’s lifestyle before recommending them. Excessive texture can catch on fabric and may not be practical for those who use their hands extensively for work.
Common Mistakes
Common Mistakes and How to Avoid Them
Perfecting Your Coffin French Tips
Even professionals make mistakes occasionally. Learn to identify and avoid the most common pitfalls when creating coffin French tips.
Top 5 Beginner Errors When Creating Coffin French Tips

Comparison showing common mistakes in French tip application vs. correct technique
Incorrect Filing Angles for True Coffin Shape
Many beginners fail to achieve the true coffin shape because they don’t maintain the correct angles when filing. The coffin shape requires straight side walls with a flat, squared-off tip.
Correct Approach:
File the sides at a perfect 90-degree angle to the top of the nail, tapering toward the tip. Ensure the free edge is filed perfectly straight across. Use a fine grit file for final shaping to avoid jagged edges.
Uneven Smile Lines
Creating symmetrical, smooth smile lines is one of the biggest challenges with French tips. Uneven lines instantly reveal amateur work and disrupt the elegant appearance of the manicure.
Correct Approach:
Use French tip guides for consistency. Start with thin, manageable layers rather than trying to create the perfect line in one go. When freehanding, rotate the client’s finger (or your own) to view the line from different angles to check for evenness.
Improper Curing Times Leading to Lifting
Insufficient curing is a common cause of premature lifting in French tips. This is especially problematic with white gel polishes, which often require longer curing times due to their opacity.
Correct Approach:
Always follow manufacturer’s guidelines for curing times. For white gel polish tips, add 15-30 seconds to the recommended curing time. Position the client’s hand properly under the lamp to ensure all tips receive adequate light exposure. Replace UV/LED bulbs according to manufacturer’s recommendations.
Neglecting Edge Capping for Durability
Failing to cap the free edge with gel or top coat significantly reduces the longevity of French tips, leading to early chipping and peeling, especially with the exposed flat edge of coffin tips.
Correct Approach:
Cap the free edge with each layer of product. Pay special attention to the corners of coffin nails which are prone to wear. With top coat, run the brush along the entire edge and slightly underneath to create a complete seal.
Using the Wrong Brush Size for French Tips
Many beginners attempt to create precise French tips with standard brushes, resulting in uneven application, flooding of the cuticles, or smile lines that lack definition.
Correct Approach:
Invest in a quality French tip brush with a thin, tapered edge specifically designed for smile lines. Clean your brush between applications to prevent product buildup that can affect precision. For beginners, a smaller brush offers more control even if application takes longer.
Real-Time Correction Strategies
Fixing an Uneven Smile Line
- Don’t remove all product – this wastes time and product
- Use a small detail brush with acetone to carefully clean up the line
- For gel polish, wipe the tacky layer, then use a thin brush to correct
- Apply top coat after corrections to smooth transitions
- When using builder gel, reshape before full curing while still in tacky stage
Correcting Shape Issues
- For asymmetrical coffin shapes, use a fine glass file for precision corrections
- Fix rounded coffin tips by filing the free edge completely straight
- For imbalanced tapering, mark center points on each nail for reference
- When one sidewall is steeper than the other, visualize angles using guide markings
- After filing corrections, buff slightly to blend and smooth transitions
When to Start Over
Sometimes corrections aren’t possible and it’s better to remove and restart. Consider this approach when:
- The French tip is more than 30% off in placement or width
- Multiple correction attempts have created a bumpy surface
- The coffin shape has been over-filed and become too narrow
- Product has flooded the cuticles and sidewalls significantly
- Lifting has already begun at the base of the enhancement
Prevention Practices That Save Time and Frustration
Preparation Techniques
- Create a template/stencil for consistent coffin shapes
- Practice smile lines on nail tips or practice wheels before client application
- Properly dehydrate natural nails for maximum adhesion
- Use thin bonder/primer layers to prevent lifting
- Set up proper lighting to spot imperfections early
Equipment Optimization
- Maintain brushes properly – clean after each use
- Check UV/LED lamp output regularly
- Keep files and buffers clean and replace when worn
- Organize workspace for efficiency and precision
- Keep product consistency optimal (not too thick or thin)
Pro Tip: The 3-Second Rule
Before curing each layer, take 3 seconds to rotate the finger and examine the application from different angles. This quick check allows you to catch and correct many common mistakes before they become permanent. Many top nail professionals use this technique to achieve flawless results every time.
Maintaining Your Tips
Maintaining Your Coffin French Tips
The Art of Maintaining Perfect French Tips
Creating beautiful coffin French tips is just the beginning of your nail journey. Proper maintenance is the key to enjoying your manicure for weeks while keeping it looking fresh and flawless. This guide covers essential maintenance practices that will extend the life of your coffin French tips and preserve their pristine appearance.
“The difference between a good manicure and a great one is proper maintenance. Your nails are an investment – treat them accordingly.”
Weekly Maintenance Schedule
Your 7-Day Maintenance Plan
- Day 1-2: Apply cuticle oil twice daily to maintain hydration around the nail bed and prevent lifting.
- Day 3-4: Check for any signs of wear at the tips and apply a thin layer of top coat if needed, focusing on the edges.
- Day 5: Gentle buffing of any rough edges without disrupting the French tip design.
- Day 6-7: Deep moisturizing treatment with hand cream and cuticle oil, followed by a fresh top coat application.
Pro Tip
Keep a small maintenance kit in your bag with a mini cuticle oil pen, travel-sized top coat, and a glass nail file for on-the-go care.

Regular maintenance keeps your French tips looking flawless
Touch-Up Techniques Between Applications
Edge Repair
The tips of coffin nails are most susceptible to wear. When you notice minor chipping:
- Gently file away any jagged edges
- Clean with alcohol to remove oils
- Apply a small amount of matching gel polish to the chip
- Cure under LED lamp for 30 seconds
- Apply thin top coat and cure again
Smile Line Refresh
If your smile line begins to look dull or uneven:
- Apply thin layer of white gel to just the French tip area
- Use a fine detail brush to reshape the smile line
- Cure properly under LED/UV lamp
- Apply thin top coat over the entire nail
- Cure again for maximum protection
Lifting Prevention
At the first sign of lifting near the cuticle:
- Carefully buff the lifted area with fine grit buffer
- Clean with alcohol and let dry completely
- Apply small amount of base gel to the lifted area
- Press down gently to remove air bubbles
- Cure for 60 seconds under lamp
Shine Restoration
When your French tips start to look dull:
- Gently buff the surface with a high-grit buffer
- Clean thoroughly with alcohol
- Apply fresh layer of non-wipe top coat
- Cure for full recommended time
- Apply cuticle oil after curing completes
Strategic Growth Management
As your natural nails grow, the gap between your cuticle and the manicure becomes more noticeable. Professional management of this growth is essential for maintaining the aesthetic appeal of your coffin French tips.
The Growth Gap Solution
- Schedule fill appointments every 2-3 weeks depending on your nail growth rate
- Between appointments, use a ridge filler to minimize the visible gap
- Apply a similar nude shade to your base color at the growth area for temporary camouflage
- Keep the growth area moisturized to prevent breakage at the stress point
Length Management
- As nails grow, the coffin shape may need minor adjustments to maintain proper proportions
- Use a professional-grade file to maintain the tapered sides of the coffin shape
- Check that the flat tip remains proportional to the overall nail length
- When shortening, always maintain the coffin angles for structural integrity
Growth Management Timeline
Special Care for Active Lifestyles
Protecting Your Coffin French Tips During Activities
For Fitness Enthusiasts
- Wear fitted workout gloves during weight training
- Apply extra top coat before starting a fitness regimen
- Keep nails at a practical length (medium rather than extra-long)
- Avoid direct impact on nail tips during floor exercises
For Water Activities
- Apply water-resistant top coat before swimming
- Limit prolonged exposure to chlorinated water
- Dry nails thoroughly after water activities
- Apply cuticle oil immediately after swimming
For Manual Work
- Wear protective gloves when cleaning or gardening
- Use tools instead of nails for tasks like opening packages
- Apply reinforcement builder gel to high-stress areas
- Consider a slightly rounded coffin shape for better durability
Daily Protection Routine
Follow this daily routine to maximize protection for active lifestyles
Apply cuticle oil and quick-dry top coat
Put on appropriate protective gear before activities
Inspect for damage and apply repair if needed
Deep moisturize with hand cream and cuticle oil
Expert Advice
“For clients with active lifestyles, I recommend a more resilient structure. Using a builder gel base with medium-viscosity formula provides flexibility while maintaining strength – perfect for coffin French tips that need to withstand daily activities.”
– Elena Martinez, Celebrity Nail Artist
When and How to Safely Remove Your French Tips
Signs It’s Time for Removal
- Excessive lifting (more than 30% of the nail)
- Visible damage to the natural nail underneath
- Growth gap greater than 1/3 of the nail length
- Persistent discomfort or pressure
- You want to give your natural nails a break
Important
Never forcefully peel or pry off your coffin French tips! This removes layers of your natural nail and causes significant damage that can take months to repair.
Professional vs. DIY Removal
Professional
- Gentler on natural nails
- Proper technique ensures no damage
- Professional assessment of nail health
- Immediate aftercare treatment
DIY
- Convenient and cost-effective
- Control over timing and process
- Requires proper tools and patience
- Higher risk of improper removal
Safe DIY Removal Process
-
1
Preparation
Gently buff the surface of each nail to break the seal of the top coat. Protect surrounding skin with petroleum jelly.
-
2
Soak Method
Soak cotton pads in 100% acetone, place on each nail, and wrap with foil. Allow to soak for 15-20 minutes.
-
3
Gentle Removal
Remove one foil at a time. The gel should be soft and crumbly. Use a wooden cuticle stick to gently push off the softened gel. Never force!
-
4
Residue Cleaning
For any remaining residue, resoak for 5 more minutes. Gently buff away any last bits with a fine buffer.
-
5
Immediate Aftercare
Wash hands thoroughly. Apply cuticle oil and a nail strengthener. Follow with intensive hand cream.
Post-Removal Nail Recovery
After removing your coffin French tips, your natural nails need time to recover. Follow this two-week intensive care regimen:
Days 1-3
- Apply nail strengthener daily
- Cuticle oil 3-4 times daily
- Avoid water exposure when possible
- Keep nails short and filed smooth
Days 4-10
- Protein treatments every other day
- Continue with cuticle oil 2-3 times daily
- Begin biotin supplements if desired
- Apply nail hardener every 3 days
Days 11-14
- Reassess nail health and strength
- Continue with daily cuticle oil
- Apply breathable nail polish if desired
- Plan next manicure if nails have recovered
Inspiration Gallery
Inspiration Gallery
Discover stunning coffin French tip designs for every occasion. From subtle everyday styles to bold statement pieces for special events, find inspiration for your next manicure masterpiece.
Featured Inspiration
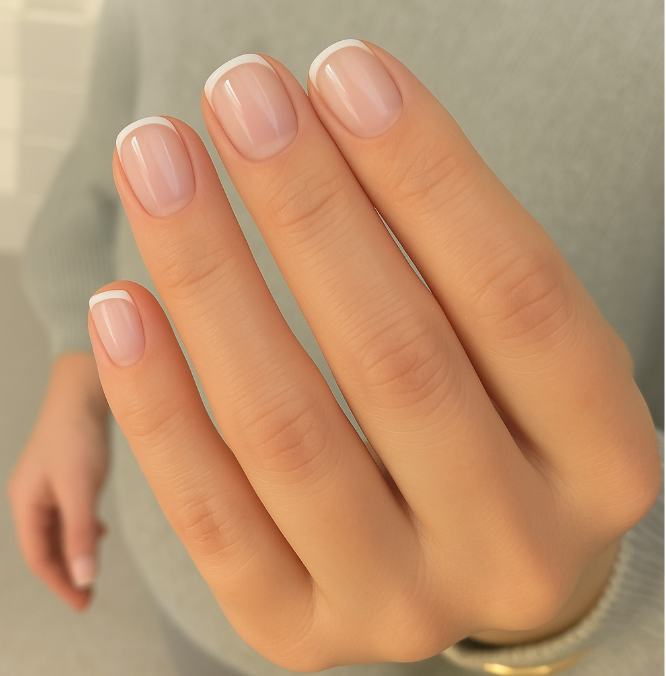
2025 Trend Collection
Our curated collection showcases the versatility of coffin French tips for various occasions and styles. From minimalist everyday looks to ornate special event designs.
Everyday Elegant Designs
Subtle, sophisticated styles that work perfectly for professional settings and casual everyday wear. These designs balance classic French tip elements with modern coffin shapes.

Classic Minimalist
Perfect for office environments or casual outings. The clean, crisp white smile line on a natural base offers timeless elegance that complements any outfit.

Modern Micro French
These subtle variations feature thin smile lines and minimalist designs perfect for everyday wear while still making a fashion statement.
Special Occasion Styles
Elevated designs perfect for weddings, important events, and celebrations. These styles incorporate luxury elements while maintaining the classic beauty of French tips.

Wedding Elegance
Sophisticated design perfect for brides and special occasions. The elegant balance of nude base and pristine white tips creates a timeless bridal look.

Glamour Statement
For galas, parties, and special events, these eye-catching designs incorporate crystals, pearls, and metallic accents while maintaining the French tip foundation.
Seasonal Adaptations
How to adapt your coffin French tips to complement each season’s colors and themes while maintaining their classic appeal.

Spring/Summer 2025
Bright accents, pastel tips, and floral-inspired designs bring seasonal freshness to coffin French tips. Consider colorful chrome tips and minimalist line art.

Fall/Winter 2025
Rich tones, metallic accents, and deeper colors characterize cold-weather French tips. Consider burgundy, emerald, or navy smile lines for a seasonal twist.
Celebrity-Inspired Coffin French Tips
Top trends from runways, red carpets, and social media that you can recreate in your own nail designs.

Red Carpet Ready
These classic but elongated coffin French tips have been spotted on celebrities at major award shows, offering timeless elegance with modern proportions.

Social Media Sensation
Inspired by trending influencers, these creative takes on French tips incorporate negative space, asymmetrical designs, and unexpected color combinations.
Customization Ideas
Make French tips your own with these personalization concepts that reflect your unique style and personality.

Personalized Shape
Adapt traditional coffin shapes to better suit your hand structure and finger length for a truly customized look that enhances your natural features.

Creative Expression
With the right tools and techniques, you can create signature designs that become your personal trademark, from custom color combinations to unique accent elements.
Pro Design Tips
Color Harmony
Choose complementary colors that work with your skin tone. Cool undertones pair well with silver accents, while warm undertones shine with gold.
Proportional Balance
The perfect French tip should have a smile line that complements your nail bed. For coffin shapes, aim for a smile line that follows the natural curve.
Strategic Accents
Less is more with accent elements. Choose one or two feature nails for special embellishments rather than overwhelming all ten fingers.
Expert Interview Insights
Mastering Coffin French Tip Nails
The Ultimate Guide for 2025
Expert Interview Insights
Professional Perspectives on Coffin French Tips
To provide you with the most comprehensive guide on coffin French tips, we’ve interviewed leading nail technicians, industry educators, and innovators who are setting trends in 2025. Their insights offer a unique window into professional techniques, upcoming trends, and the future of nail artistry.

Alexandra Bennett
Celebrity Nail Artist & Educator
“The coffin French tip has evolved from a classic style to a canvas for creativity. What we’re seeing in 2025 is a beautiful marriage of traditional techniques with boundary-pushing innovation. The key to mastery is understanding both worlds.”
Professional Nail Tech Secrets
The Perfect Smile Line Formula
According to master nail technician Maria Lopez, the secret to a flawless smile line is in the angle: “I position my brush at a 45° angle against the nail and use the side of the brush rather than the tip. This gives you much more control and creates that perfect curve that clientele are willing to pay premium prices for.”
The 90% Rule
“Preparation accounts for 90% of a successful coffin French tip,” says veteran nail artist David Chen. “Most technicians rush through prep to get to the ‘fun part,’ but thorough dehydration, proper priming, and meticulous shaping of the coffin form beforehand determines everything about the final result.”
The Builder Gel Hack
Award-winning nail educator Jamie Williams revealed: “Many professionals use a clear builder gel as a ‘sandwich layer’ between the base and the French tip. This invisible layer adds structural stability to the coffin shape and prevents the white tip from chipping or lifting, extending wear time by 40-50%.”
Industry Forecasts for Future Trends
Dimensional French Tips
“By late 2025, we’ll see 3D French tips becoming mainstream,” predicts trend forecaster Sophia Kim. “The traditional flat white edge will evolve into subtle raised designs that catch light differently, adding dimension without sacrificing elegance.”
Environmental Compliance
“The industry is rapidly moving toward eco-compliance,” notes beauty industry analyst Thomas Wright. “By 2026, we expect most premium salons will exclusively offer biodegradable or reduced-chemical French tip options as consumer demand for sustainable beauty practices continues to rise.”
Custom Color Matching
“The one-size-fits-all French tip is disappearing,” says celebrity nail artist Rebecca Johnson. “We’re seeing a surge in custom-blended base shades that perfectly match the client’s natural nail bed color, creating a seamless, truly personalized French manicure.”
Technology Integration
“Smart French tips with embedded tech are just beginning,” explains tech beauty innovator Adrian Park. “We’re developing French tips with temperature-responsive pigments that subtly shift shade based on environment, adding a functional element to the aesthetic.”
Materials Innovations

Self-Leveling Polymers
“The game-changer in 2025 is next-generation self-leveling polymers,” explains cosmetic chemist Dr. Michelle Zhang. “These new formulations contain microscopic sensors that detect surface irregularities and actively redistribute during curing to create the perfect coffin shape with minimal filing.”
Ultra-Thin Ceramics
Industry innovator Kevin Patel shares, “Ultra-thin ceramic particles are now being incorporated into premium tips, providing the strength of traditional acrylics but at a fraction of the thickness. This allows for more natural-feeling coffin French tips that are still durable enough for daily wear.”
Breathable Technology
“Oxygen-permeable polymers represent the biggest advancement in nail health,” states nail health specialist Dr. Amanda Rodriguez. “These new breathable bases allow for oxygen and water vapor transmission while maintaining the structural integrity needed for coffin shapes, significantly reducing the risk of fungal infections and nail damage.”
Sustainability in Modern Nail Art
“The future of French tips isn’t just about aesthetics—it’s about responsibility. Clients are increasingly asking about eco-friendly options, and the industry is responding with innovation.”
— Olivia Parker, Sustainable Beauty Advocate
Biodegradable Extensions
Leading salons are now offering biodegradable nail extensions made from plant-based polymers. These break down naturally after disposal while maintaining the structural integrity needed for perfect coffin shapes during wear.
Reduced Chemical Formulations
New “10-free” and “12-free” formulations eliminate harmful chemicals while still providing the opacity needed for crisp French tips. These healthier alternatives reduce environmental impact and salon air pollution.
Solar-Cured Systems
Innovative salons are installing solar-powered LED curing lamps, reducing energy consumption while providing the perfect cure for French tip applications. These systems cut electricity usage by up to 75% compared to traditional UV lamps.
Refillable Product Systems
Premium brands now offer refillable containers for French tip products, dramatically reducing packaging waste. Clients purchase the full package initially, then return for eco-friendly refills at a reduced price.
Coming Soon: Conclusion
This section will help you reflect on your French tip journey from beginner to pro.
Coming Soon: Resources & References
This section will provide a curated list of recommended products, educational channels, and troubleshooting guides.


